How to Tie a Constrictor Knot
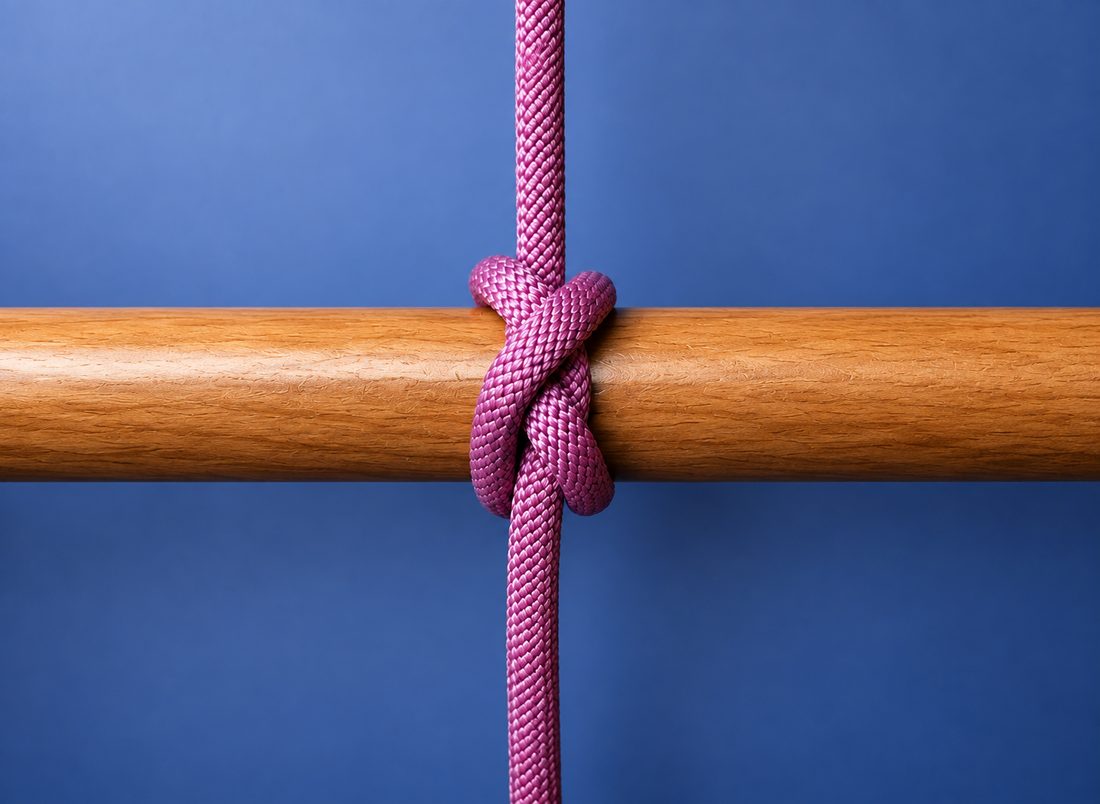
The constrictor knot is a binding knot that grips hard and is meant not to let go. On very slick line or a polished surface it can slip rather than bind. This guide shows you two ways to tie it, plus how to release it when the job is done.
Materials
- A length of cord or rope, thinner than the thing you are binding
- Something to bind, such as a sack neck or a bundle
- A knife, to cut the knot off afterwards
- Eye protection, for cutting the knot off afterwards
Steps
-
How will you tie it?
Both ways give exactly the same knot, and neither is better tied. The only question is whether the end of the object is free.
Think before you tighten: this is a knot you commit to. A constrictor is meant to seize, and a firmly set one usually has to be cut off rather than untied. Set lightly, in thick or stiff line, you can sometimes work it loose by hand.This is a binding knot and nothing else: use it to hold something closed or hold something together. It is not a loop to put over a post, not a hitch to hoist with, and not for anything taking a person's weight. Reach for a knot meant for that job instead.Never around a finger, wrist or limb: a constrictor bites harder the more it is pulled, and it will cut off circulation. Practise on a bundle, a sack neck or a length of pipe.Pass it around the object
Works on anything you can get the line around, including a pipe running into a wall.
Wrap it twice and tuck the end
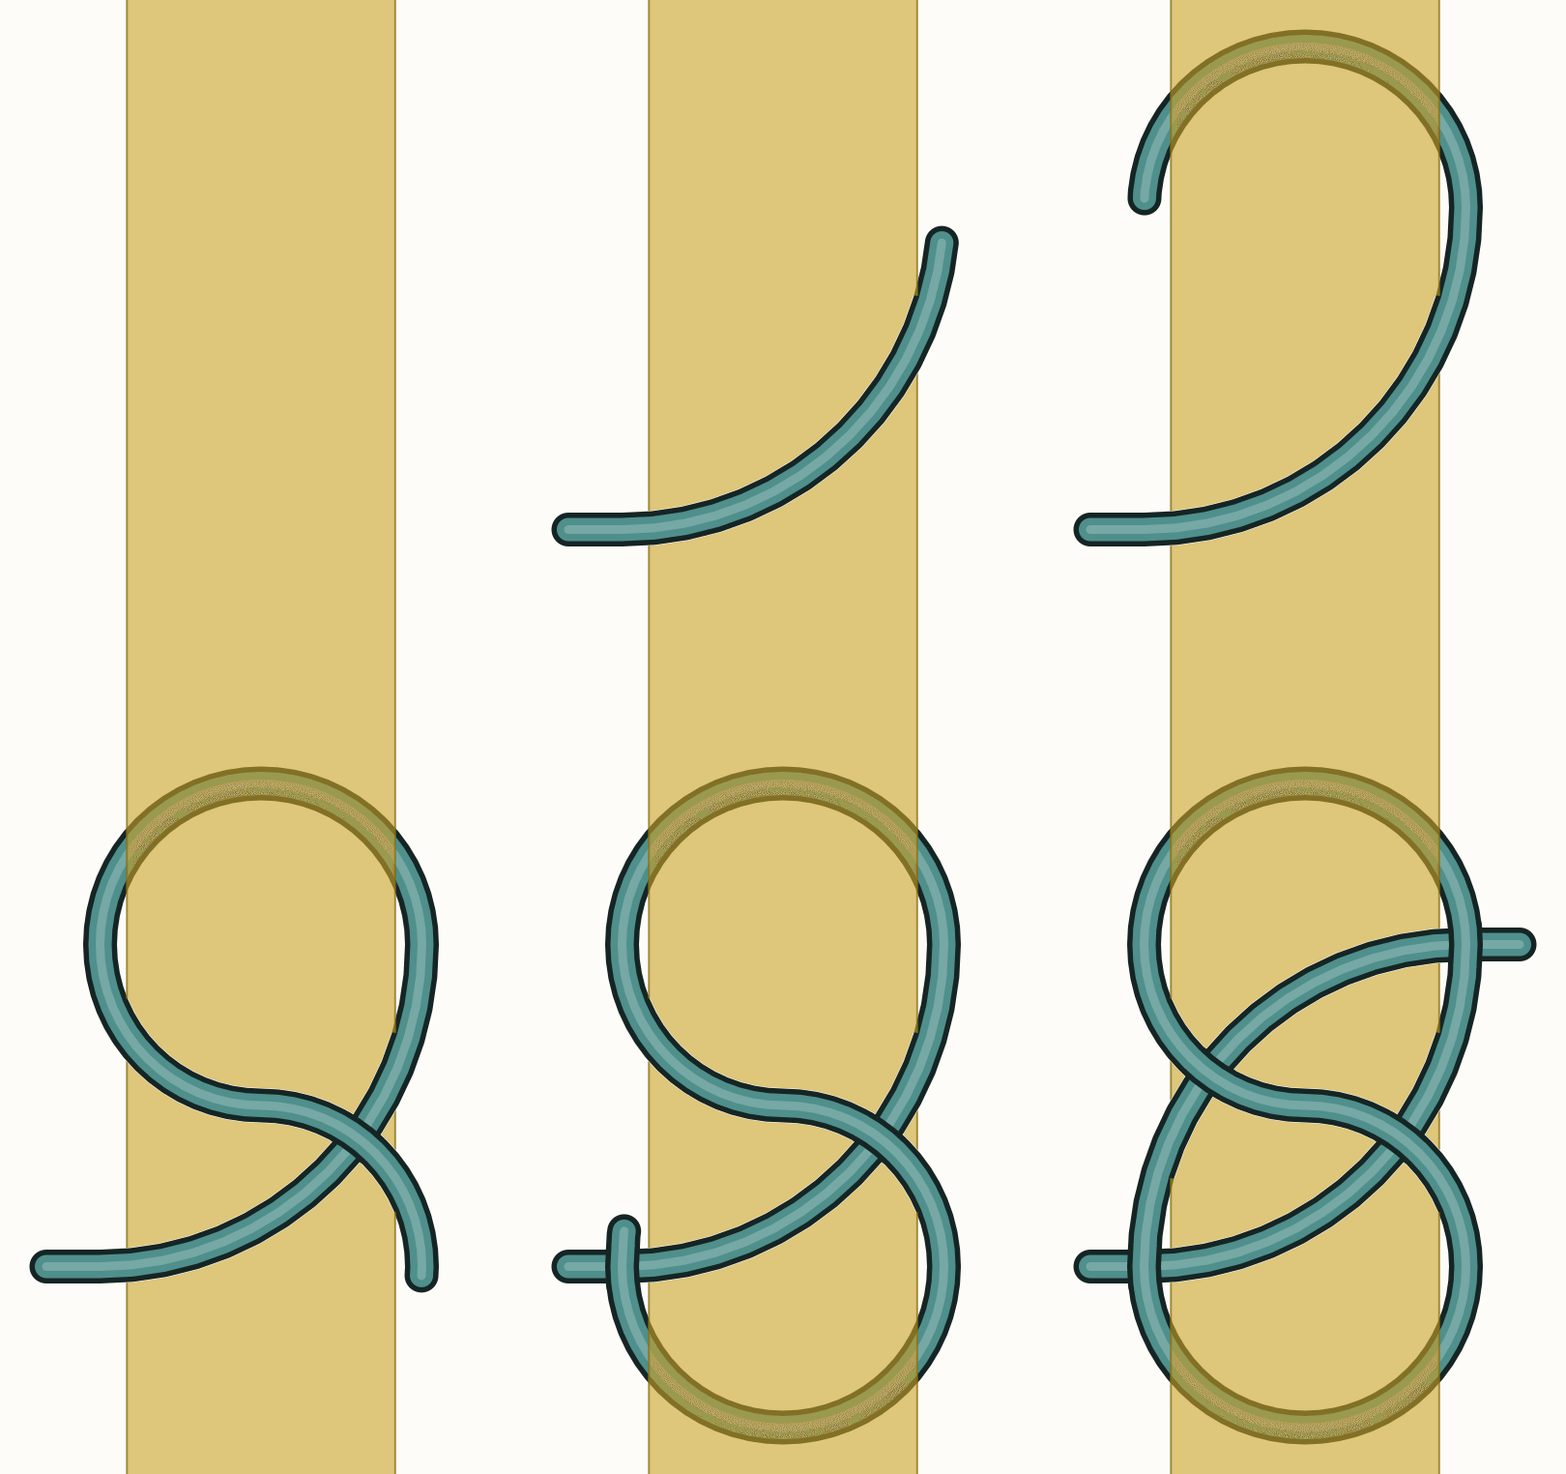
Pass the rope around the object. Bring the working end back over the standing part. Pass around the object a second time. The strand now lying diagonally across the top is the riding turn. Tuck the working end under the riding turn and the standing part together. Before you pull it home, check where the ends come out. On a constrictor both ends come out close together near the middle, trapped under the strand crossing over them. If they come out at the outside edges running parallel, you have tied a clove hitch. That still grips a little, but it will not bind the way a constrictor does. Slide it off and start again. Once the ends look right, pull both ends tight.
Optional: tie the slipped version
If you want the knot to come undone more easily, finish that final tuck with a bight instead of the working end. This slipped version releases faster. Even so, it can still be hard to undo in some rope materials when you work it very tight.
- A bight is not a loop: a bight is a doubled section of rope, made by folding the line back on itself without crossing it. A loop crosses. When you tuck a bight instead of the end, a folded tail sticks out of the finished knot. Pull that tail and the knot collapses.
Drop a loop over a free end
Faster, but only for something with a free end, like a bundle of loose rope.
Drop the loop, twist it, and drop it again
Drop a loose loop over the end. Reach under the loop and grab it at the crossing point. Twist it half a turn to form a figure 8. Pass the loop over the end a second time, taking it over the crossing point as you go. Before you pull it home, check where the ends come out. On a constrictor both ends come out close together near the middle, trapped under the strand crossing over them. If they come out at the outside edges running parallel, you have tied a clove hitch. Slide it off and start again. Once the ends look right, tighten it.
What you have just tied: a constrictor is a half knot sitting under the riding turn. It is close to a clove hitch, and the difference is that one end passes under the other. The riding turn then wedges that crossing against the standing part, and that is what makes it bind rather than merely hold. 
The whole knot, once through. The bar is drawn see-through so the turns behind it stay visible. 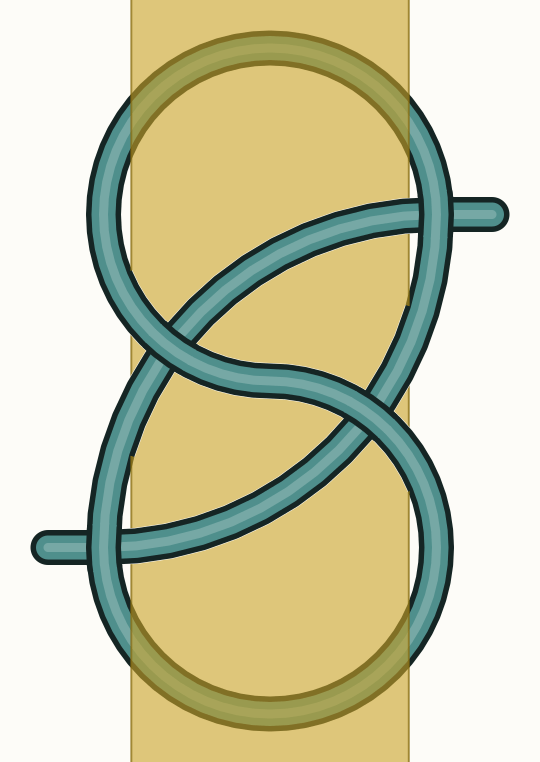
Cut it off when you are done
Look at the knot. A slipped constrictor leaves a folded tail, a bight, sticking out of it. If you see that fold, pull it. The knot should collapse, though a hard set one in some rope can still resist. Otherwise plan on cutting it, because a set constrictor jams. Put your eye protection on first. Cut the riding turn, which is the strand lying diagonally across the top, where it crosses over the turns underneath. Those turns take the blade and protect the rope or the object you bound. Cut away from your hand, and keep your face and body out of the line of the knot. Expect the binding to spring when it parts.
Tips
- A constrictor on a fraying rope end holds the fibres together until you whip or splice the end properly. The slipped version comes off again when you get there.
- Learn both ways, not just the one you like. Dropping a loop over the end is faster, but it only works when that end is free. If you can only tie the constrictor one way, sooner or later you will meet an object you cannot get a loop over.
- Match the line to the job. Thin line around a thicker object is where this knot shines, because thin line digs in. The closer the line gets to the thickness of what you are binding, the less it grips.
Sources
Each step in this guide is drawn from facts stated by several of these pages independently. Sources that did not corroborate anything used here are not listed.
- How to Tie a Constrictor Knot Step by Step knotspedia.com
- Tie the Constrictor knot using the rope end method. animatedknots.com
- How to Tie a Constrictor Knot? Steps, Variations, Video & 101knots.com
- Constrictor Knot - Step by Step How to Tie It - Survival Sullivan survivalsullivan.com
- How to Tie a Constrictor Knot - knotinstructions.com knotinstructions.com
Leave a comment
Comments are reviewed before appearing. See our Privacy Policy for how your name and message are handled.
Comments
No comments yet.