How to Whistle With Your Fingers
A finger whistle is loud enough to carry across a field, and it costs nothing but practice. This guide takes you from an empty mouth to a clean, piercing note.
Steps
Understand what your fingers do
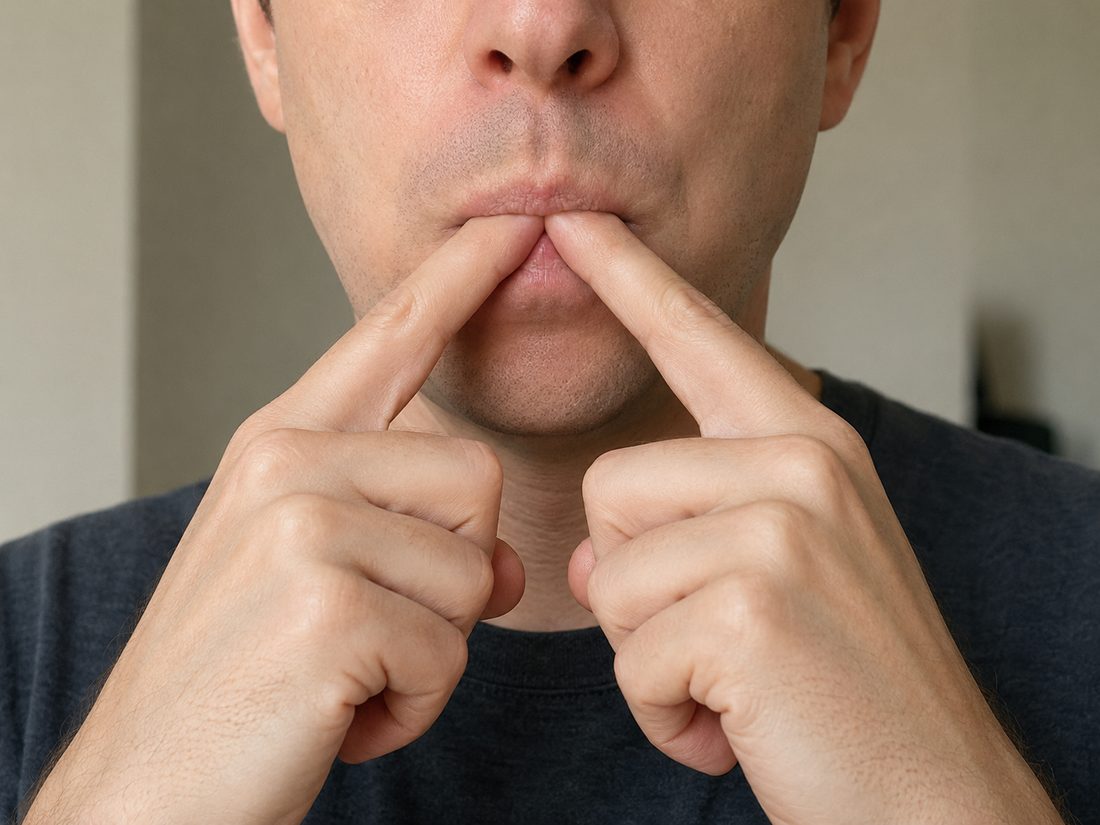
Your fingers are not the thing that makes the noise. They hold your tongue pushed back, and they hold your lips tucked back over your teeth. That shape forms a bevel, an angled edge that produces a tone when you blow across it.
- What the fingers actually do: they are a clamp, not a noisemaker. The sound comes from air splitting across the bevel that your tucked lips and pushed-back tongue create. That is why the shape of your mouth matters more than how hard you can blow, and why forcing more air through a bad shape gets you nothing.
Pick a hand shape that suits you
There is more than one way to hold your fingers. The two-handed shape using the index and middle fingers, held like a letter A or an upside down V, is often reported as the loudest. The one-handed OK sign, made with thumb and index or thumb and middle finger, leaves your other hand free. The pinky variants, using one hand's index and pinky or both pinkies, suit larger hands or mouths. Your own hand and mouth size decide, along with whether you need a hand free. Try each one and keep whichever makes a sound first.
Form the two-handed A
For the two-handed version, extend the index and middle fingers of both hands. Each thumb holds that hand's ring and pinky fingers down. Touch the two middle fingertips together so the fingers make an A shape. This is the one to choose when both hands are free and you want the loudest, most forceful whistle.
Or form the one-handed ring
If you need to keep a hand free instead, press the tips of your thumb and index finger together into an OK sign ring. Your middle finger works in place of the index if that feels better. Insert that ring into your mouth. The whistle comes out slightly less forceful than the two-handed one.
- Wet lips are not a nicety: dry lips break the seal that the whistle depends on, and moisture gives a cleaner sound. Moisture also wears off fast. That is why this belongs at the start of every single attempt, not just the first one of the session.
Wet your lips
Whichever shape you settled on, wet your lips before each attempt. Lightly moistening your fingertips does the same job. Dry lips break the seal, and moisture helps produce a cleaner sound.
Curl your lips over your teeth
With your lips damp, tuck or curl them inward until they completely cover your teeth. Do this before your fingers go anywhere near your mouth. Uncovered teeth are the most common reason no whistle sounds at all.
Insert the fingertips half an inch
Now slide the fingertips in near your front teeth. Go in only about half an inch, roughly to the first knuckle. Any shallower and they do not redirect the airflow. Any deeper and they push the tongue back until the channel collapses or you gag.
Push your tongue back
At that depth, use your fingertips to push your tongue back into your mouth. Fold the tip of the tongue back on itself and hold it there with your fingers. The front of the mouth stays open, and the tongue does not block the hole between your fingers.
Seal your mouth around your fingers
Close your mouth tightly around your fingers so the seal is complete. The only gap air can escape from should be the hole between your fingers. If air leaks from the corners of your mouth, close tighter.
Blow downward at 45 degrees
Holding that seal, aim your breath downward toward your lower lip at roughly a 45 degree angle. Do not blow straight out through the gap between your fingers. The downward angle splits the air across the lip edge, and that is what makes the tone.
Adjust in small steps
Expect to fail at first. Start with a soft or medium blow rather than maximum force. Make small changes to finger angle, finger depth and tongue position until a tone appears, then repeat that exact shape. If nothing comes out at all, .
- How to Check Your Shape When No Sound Comes
- Check your teeth are covered Take your fingers out and look in a mirror. Roll your lips inward until no tooth shows at all, then put your fingers back.
- Check the depth Your fingertips should sit near your front teeth, about half an inch in, roughly to the first knuckle. Pull them back out if they have gone deeper.
- Check the tongue Feel whether the tip of your tongue is still folded back and held there by your fingers. If it has slipped forward, it is blocking the hole between them.
- Check the seal Blow gently and feel for air at the corners of your mouth. Any leak there means your mouth is not closed tightly enough around your fingers.
- Check the angle Aim the breath down at your lower lip at about 45 degrees rather than straight out through the gap. Then try one more soft blow.
Listen for the bottle sound
You know you are close to the sweet spot when you start making a noise like blowing over the top of a beer bottle. From there, blow more forcefully to get the high pitched loud whistle.
- A hollow, bottle-like noise is good news: it means your shape is nearly right rather than wrong. Beginners often hear that breathy note, decide it is a failure and change everything. It is the last landmark before the whistle itself. What is missing at that point is force, not a new hand position.
Practise in front of a mirror
A mirror is worth using while you hunt for that shape. You can see how far your lips are rolled, and whether your finger depth changes between attempts.
Take breaks between attempts
Stop regularly rather than blowing continuously. Non-stop blowing causes hyperventilation, lightheadedness, dizziness and headaches. If your mouth gets sore, stop for the day.
Give it more than one session
Learning time varies widely. The Art of Manliness author got it after 40 minutes of practice split over two days. Kevin and Amanda report 5 to 10 minutes. Survival Smart cautions that most beginners need three to ten short sessions spread over a week rather than a single five minute success.
Tips
- If the two-handed A never works for you, the shape may simply not fit your hands or mouth. Larger hands and mouths often do better with the index and pinky version, or with both pinkies. The shape that sounds first is the right one, whatever anyone else uses.
- Learn the one-handed OK sign version too, even after the two-handed one works. It gives up a little force, but it is the only one you can use while carrying something or holding a dog lead.
- Do not measure yourself against the people who got it in five minutes. Three to ten short sessions across a week is the normal path, and stopping while your mouth still feels fine is what lets you come back tomorrow.
Sources
Each step in this guide is drawn from facts stated by several of these pages independently. Sources that did not corroborate anything used here are not listed.
- How to Finger Whistle: Loud Two-Finger Whistle Guide survivalsmart.com
- How to Whistle With Your Fingers Really Loud: Step-by-Step Guide askaprepper.com
- How to Whistle With Your Fingers – Todd K Marsha toddkmarsha.com
- How to Whistle With Your Fingers | The Art of Manliness artofmanliness.com
- How to Whistle with Your Fingers betooler.com
- How To Whistle Really Loud With Your Fingers kevinandamanda.com
Leave a comment
Comments are reviewed before appearing. See our Privacy Policy for how your name and message are handled.
Comments
No comments yet.