How to Repot a Houseplant
Repotting gives a crowded houseplant fresh soil and room for new roots. This guide covers when to do it, what pot and mix to use, and how to move the plant across without hurting it.
Steps
Spot the signs it is time
Roots poking out of the drainage holes or circling on the soil surface mean the plant has outgrown its pot. So does soil that dries out very fast, or water that runs straight through without soaking in. Stalled growth, a plant that has gone top-heavy, and a white salt or mineral crust on the soil are signs too.
Judge orchids differently
Orchids are the exception to all of that. Do not go by crowded roots, because aerial roots spilling over the pot are a sign of health. Repot when the bark mix breaks down and turns mushy, which happens every 12 to 24 months.
- Orchids break the usual rule: Roots spilling over the side of an orchid pot look alarming, but they are aerial roots and a sign of a healthy plant. Crowding is not what tells you to repot an orchid. The state of the bark mix is. It breaks down and goes mushy every 12 to 24 months, and that is the real signal.
Repot in spring
For every other plant, the best time is spring and into early summer, just as active growth begins. The plant recovers quickly and has the whole growing season to establish itself.
Know when to wait
Some moments are wrong. Do not repot a plant in winter dormancy, one in flower, or one already stressed by pests or illness. A freshly bought plant needs 2 to 6 weeks to acclimate first. The one exception is acute distress such as spreading root rot, which you deal with immediately whatever the season.
Pick a pot one size up
Once the timing is right, choose a new pot only 1 to 2 inches larger in diameter than the current one. An oversized pot holds extra soil that stays wet too long, and that causes root rot.
- Bigger is not kinder: A big pot looks generous, but the plant only fills part of it with roots. The rest is soil with nothing drawing the water out of it. It stays wet far too long, and roots sitting in wet soil are what rot. That is why the step above holds you to an inch or two.
Check it has drainage holes
The new pot must have drainage holes. Set on a decorative pot with no holes? Plant into a plastic nursery pot that drains, then slip that inside the decorative one. Used this way, the outer pot is called a cachepot.
Buy fresh potting mix
With the pot chosen, get a fresh soilless potting mix made for indoor plants. Never use garden or outdoor soil. It is too heavy, it holds too much water, and it can introduce pests and disease.
Match the mix to the plant
One universal soil does not suit everything. Use standard potting mix with added perlite for tropical foliage. Use a fast-draining cactus and succulent mix for succulents and cacti. Orchids need a bark-based mix, because they rot in ordinary compost.
Water the plant beforehand
Water the plant a few hours to two days before you repot it. A moist root ball holds together, slides out of the pot more easily, and suffers less root damage.
Ease the plant out
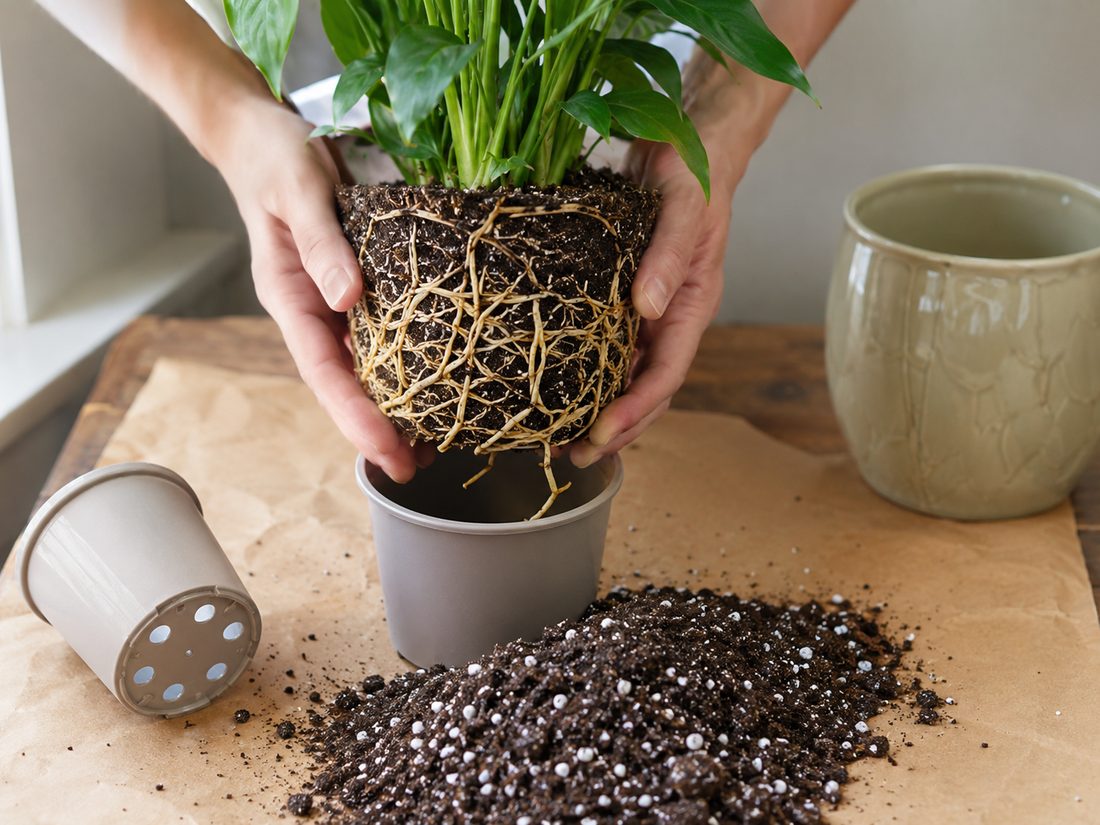
Tip the pot on its side. Support the base of the stem, then tap or squeeze the pot. If the plant still will not release, run a knife or blade around the inside edge of the pot. Never pull the plant out by its stem.
- Never lift a plant by its stem: The stem is the one part that cannot take the weight of a full root ball. Tipping the pot on its side, supporting the base of the stem and tapping or squeezing the sides does the work instead. Anything still stuck comes free once a blade has been run round the inside edge.
Trim away dead roots
With the plant out, look over the roots. Cut off anything dead, black, brown, mushy or damaged, using clean scissors. Healthy roots are white to light tan and firm, so leave those alone.
Tease out circling roots
Next, loosen or gently pull apart any roots that circle the root ball. Left in a compacted coil, they keep growing round in that circle instead of spreading outward into the fresh mix.
Set the plant at the right depth
Add a base layer of fresh mix to the new pot. Set the root ball so its top sits about an inch below the rim, at the same soil level as before, then fill in around the sides. That inch of headspace stops water overflowing when you water.
Firm the soil gently
Press the soil gently to get rid of air pockets. Do not compact it. Roots need air in the mix.
Water it in
Finish by watering thoroughly, until water runs from the drainage holes. This settles the mix around the roots and closes any air pockets that are left. Empty the saucer afterwards rather than letting the pot stand in water.
Tips
- A plant you have just brought home is not ready to be repotted. Give it 2 to 6 weeks to acclimate first, even if the nursery pot looks tight. The same goes for a plant in flower and a plant fighting pests.
- Match the mix to the plant rather than buying one bag for the whole shelf. Tropical foliage wants standard mix with perlite, succulents and cacti want a fast-draining mix, and orchids want bark.
- Never leave the pot standing in a full saucer. The water that ran out of the drainage holes was on its way out for a reason, and letting it sit there undoes the drainage you just set up.
Sources
Each step in this guide is drawn from facts stated by several of these pages independently. Sources that did not corroborate anything used here are not listed.
- How to Repot Houseplants: Choose the Right Size Pot and the Compost Mix ... bloomingexpert.com
- How to Repot a Houseplant — The Complete Step-by-Step Guide plantcarecentral.com
- How to Repot a Houseplant: Step-by-Step Guide for Beginners pottingcorner.com
- How and When to Repot Houseplants: A Repotting Plant Guide epicgardening.com
- Repotting Houseplants extension.psu.edu
- Repotting Houseplants: How to Repot a Houseplant for Beginners ... almanac.com
Leave a comment
Comments are reviewed before appearing. See our Privacy Policy for how your name and message are handled.
Comments
No comments yet.