How to Make Compost
Compost is dead plant and food matter that has broken down into something dark and crumbly. Dug into a bed, it improves the soil's structure. It helps the soil hold water. It also feeds plants slowly, a little at a time, instead of all at once. To make it, stack dry material and green material in roughly the right amounts. Keep the pile damp. Turn it often enough to get air into the middle. This guide covers a hot pile, one you look after actively. That is the version worth the effort.
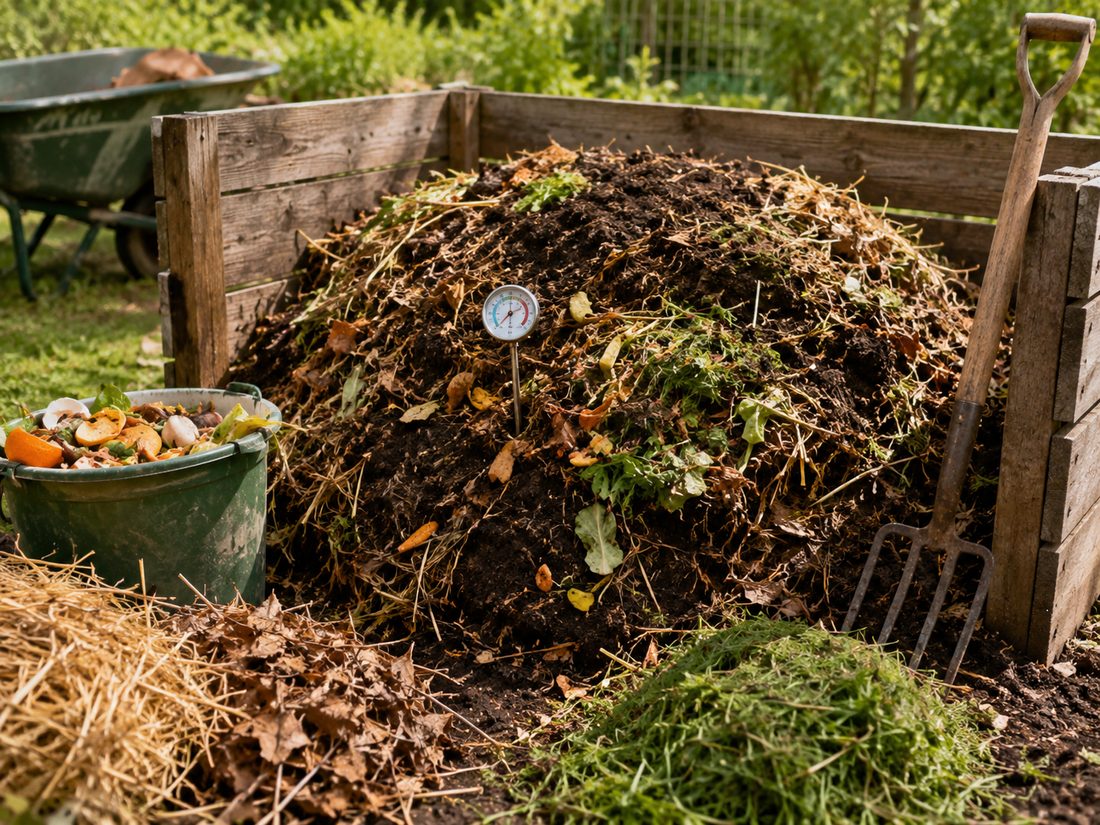
Materials
- Garden fork or pitchfork
- Compost thermometer
- Browns such as dry leaves, straw, or shredded cardboard
- Greens such as grass clippings, vegetable scraps, or coffee grounds
Steps
Lay a coarse base
. Lay down a layer of coarse browns, 4 to 6 inches deep. Browns are dry, woody material, such as twigs, wood chips or straw. This base soaks up liquid draining down from the material above it. It also keeps a channel of air open underneath. That stops the bottom of the pile packing down into a wet mat.
- How to clear and prepare bare ground for the pile
- Pick the spot Choose level, well drained ground in part shade. Keep it within reach of a hose and close enough that you will actually walk out to turn it.
- Mark out the footprint Mark a square at least 3 feet on each side. Smaller than that and the pile will never hold heat. Leave a step of clear space on at least one side so you have room to work a fork.
- Strip off grass and weeds Cut the sod into strips with a spade and lift it away. Shake the loose soil off each strip. Stack the strips grass side down somewhere else, because they will rot into good soil on their own.
- Pull out roots and stones Go over the bare soil and take out large stones, woody roots and any running weed roots. Running roots will grow straight up through a new pile if you leave them.
- Loosen the soil Drive a garden fork in and rock it back and forth across the whole square, about 8 inches deep. Do not turn the soil over. Loosening lets liquid drain away and lets worms move up into the pile from below.
Chop or shred large pieces
Cut or shred anything bulky before it goes in. That means thick stems, prunings, whole cabbage leaves and flattened cardboard. Smaller pieces give far more surface for the microbes to work on. Microbes are the tiny living things that break the pile down. So the pile gets through the material faster.
Build the pile up in damp layers
Build the pile up in layers, and alternate greens and browns. Greens are fresh, wet material rich in nitrogen, such as grass clippings, vegetable scraps and coffee grounds. Browns are dry material rich in carbon, such as dry leaves, straw and shredded cardboard. Aim for roughly two to three parts browns to one part greens by volume. Dampen each layer lightly as you lay it down. Do not soak the finished pile from the top, because most of that water just runs off. The whole pile should feel like a wrung-out sponge. It should be damp all the way through. Squeeze a handful and it should not drip. Layering is only a way to keep track of the amounts as you go. It is not a structure worth protecting. The layers will mix together the first time you turn the pile, and that is what should happen.
- Some things never go in. No meat, fish, bones, dairy, fats or oils. They attract pests and turn foul as they break down. No dog or cat waste either, and no used cat litter. These can carry parasites and bacteria. Home composting does not reliably destroy them.
Turn the pile every week or two
Work a garden fork into the pile and turn it over. Bring the outside material into the middle. Break up any layers still sitting whole. Every week or two is enough. Stand upwind and wear a dust mask while you turn it. A pile throws up a cloud of mould spores, which can settle in the lungs. Turning mixes the materials. It also pulls fresh oxygen down to the center, which is what the microbes need to keep working. Turning is also when the pile tells you what it wants. Soggy and sour means add browns and turn it more often. Dry means water it. Damp but stubbornly cold means it is short on greens, or simply too small.
Check the temperature at the center
Push a compost thermometer into the middle of the pile, where the heat is. A working hot pile reads between 130 and 160 degrees Fahrenheit at the center. That is 54 to 71 degrees Celsius. Temperatures that stay in that range kill many weed seeds and many disease-causing germs. But they only kill them in the material that actually reaches that heat. That is why turning the outside into the middle matters. If the pile never climbs into that range, it is usually too dry, too small, or short on greens.
- A cold pile will not sterilize anything. A pile you build and then leave alone never gets hot enough. It never reaches the temperatures that kill weed seeds and plant diseases. So if you are not going to turn it and watch its temperature, leave some things out. Keep out diseased plants. Keep out weeds that have gone to seed. Keep out invasive perennials, the tough spreading plants that come back year after year. All three survive a cold pile. You then spread them across your garden the moment you use the compost. Before you spread compost on anything you plan to eat, check that it reached 130 degrees Fahrenheit and stayed there. Compost that looks finished gives no sign either way.
Check whether it is finished
Pick up a handful. Finished compost is dark brown or black. It crumbles apart instead of holding its shape. It smells like fresh earth. A sour smell means it needs longer and more air. A sharp ammonia smell is different. Ammonia is the sharp smell of cleaning fluid. It means too much nitrogen, so mix in browns rather than just waiting.
Tips
- Build the pile at least 3 feet wide, 3 feet deep and 3 feet tall. Much below that, there is not enough mass to hold heat. Too small a pile is one of the most common reasons a pile never reaches 130 degrees.
Sources
Each step in this guide is drawn from facts stated by several of these pages independently. Sources that did not corroborate anything used here are not listed.
- How to Make Compost at Home: Turn Kitchen Scraps into Free Fertilizer gardentruth.com
- How to Make Compost: A Guide to Composting at Home almanac.com
- Composting At Home | US EPA epa.gov
- How to Compost at Home: A Complete Beginner's Guide eartheasy.com
- 4 Essential Steps for Successfully Making Your Own Compost bhg.com
- How to Make Compost at Home - UMD Extension extension.umd.edu
Leave a comment
Comments are reviewed before appearing. See our Privacy Policy for how your name and message are handled.
Comments
No comments yet.