How to Read a Cross Stitch Chart
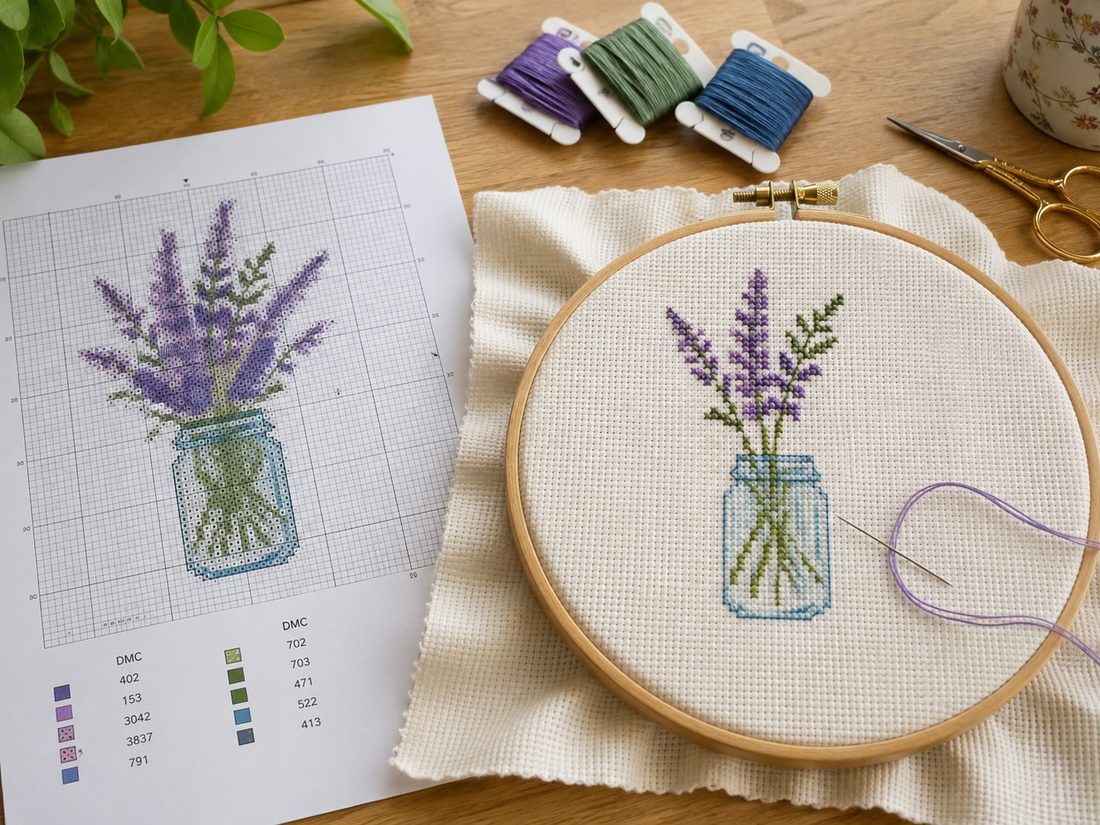
A cross stitch chart is the map for your whole project. Once you can read one, the stitching itself becomes easy. This guide explains what the grid, the symbols and the markings mean. It also shows you how to place your first stitch in the right spot.
Tools for this
- Cross-Stitch Patterns — Charts to work from or print, including the flower from the cross-stitch guide, for when you want to stitch something and have not settled on a design.
- Cross-Stitch Lettering — Turn any words into a cross-stitch chart - a name, a date, or a message for a card - in a simple sampler alphabet.
Materials
- cross stitch chart
- fabric
- thread
- contrasting thread
- pin
- pen
- highlighter
- coloured pencil
Steps
Read the grid as stitches
A cross stitch chart is just a grid. Every square in it stands for one cross stitch worked on your fabric.
Use the bold lines to count
Look closely at the grid. You will see darker, thicker lines every 10 squares. They are there to make counting stitches easier.
Match symbols to the key
Each symbol in a square stands for one thread colour. The key, also called the legend, tells you which colour each symbol means.
Check the key every time
Symbols are not the same from pattern to pattern. The same symbol can mean a different colour in another design. Always use the key that came with the pattern in front of you.
Leave blank squares unstitched
Not every square has a symbol. A blank square means you stitch nothing there. Leave the fabric bare.
Spot the backstitch lines
Backstitch is shown as a solid or dashed line. The line runs along or between the grid squares. Backstitch is used for outlines, letters and fine details. is its own short job.
- How to work a line of backstitch along the chart line
- Find where the line starts and stops Look at the chart and see which holes the line runs between. Work out the start point and the end point before you begin.
- Come up one stitch along Bring the needle up from the back one stitch length ahead of the start point, following the line.
- Go back down at the start Take the needle down through the start hole. You have made your first backstitch.
- Come up one stitch further on Bring the needle up one stitch length beyond the stitch you just made, again following the line.
- Go down into the last hole Take the needle down into the hole at the end of the previous stitch. Repeat these last two moves to the end of the line.
Find the centre arrows
Look at the edges of the chart. There is an arrow at the top and an arrow at the side. They mark the centre of the design. The centre is where the two arrows meet.
Fold your fabric to find centre
Now find the centre of your fabric. Fold it in half one way, then in half the other way. The centre is where the two folds cross. Mark that point with a pin, a pen or a piece of thread in a different colour.
Begin at the centre
You now know both centres. Start stitching at the centre of the design and work outwards. This way the finished design sits in the right place on the fabric.
Work one block at a time
As you work outwards, take the chart one 10×10 section at a time. Do not try to take in the whole chart at once.
- Why the blocks are ten by ten: the darker lines every 10 squares have already divided the chart for you. One block is a small enough piece of it to hold in your head.
Count against a grid line
Check your count often. Count from a fixed point you can trust, such as a grid line, not from the edge of the pattern. Catching a mistake early saves hours of unpicking.
Mark off what you've stitched
Keep track of where you are. On a printed chart, use a highlighter or a coloured pencil to mark off the rows or sections you have finished.
Sources
Each step in this guide is drawn from facts stated by several of these pages independently. Sources that did not corroborate anything used here are not listed.
- How to Read a Cross Stitch Pattern | Beginner's Guide cross-stitched.com
- How to Read a Cross Stitch Pattern — Complete Beginner Guide stitchmate.app
- How to Read Cross Stitch Patterns: A Complete Guide xstitchify.com
- How to Read a Cross Stitch Pattern: Symbols, Colors, and Charts ... crossstitchpatternsmaker.com
- How to Read a Cross Stitch Chart: Complete Beginner's Guide thestitcherycorner.com
- How to Read a Cross-Stitch Pattern Without Getting Lost - froggingnews.com
Leave a comment
Comments are reviewed before appearing. See our Privacy Policy for how your name and message are handled.
Comments
No comments yet.