How to Start Tomato Seedlings from Seed
Tomatoes are easy to grow from seed indoors. Starting your own also gives you varieties that no garden center will ever sell. The work spreads over a couple of months, but the hands-on time is small. You sow the seeds, give them light and water for a few weeks, then move them outdoors slowly.
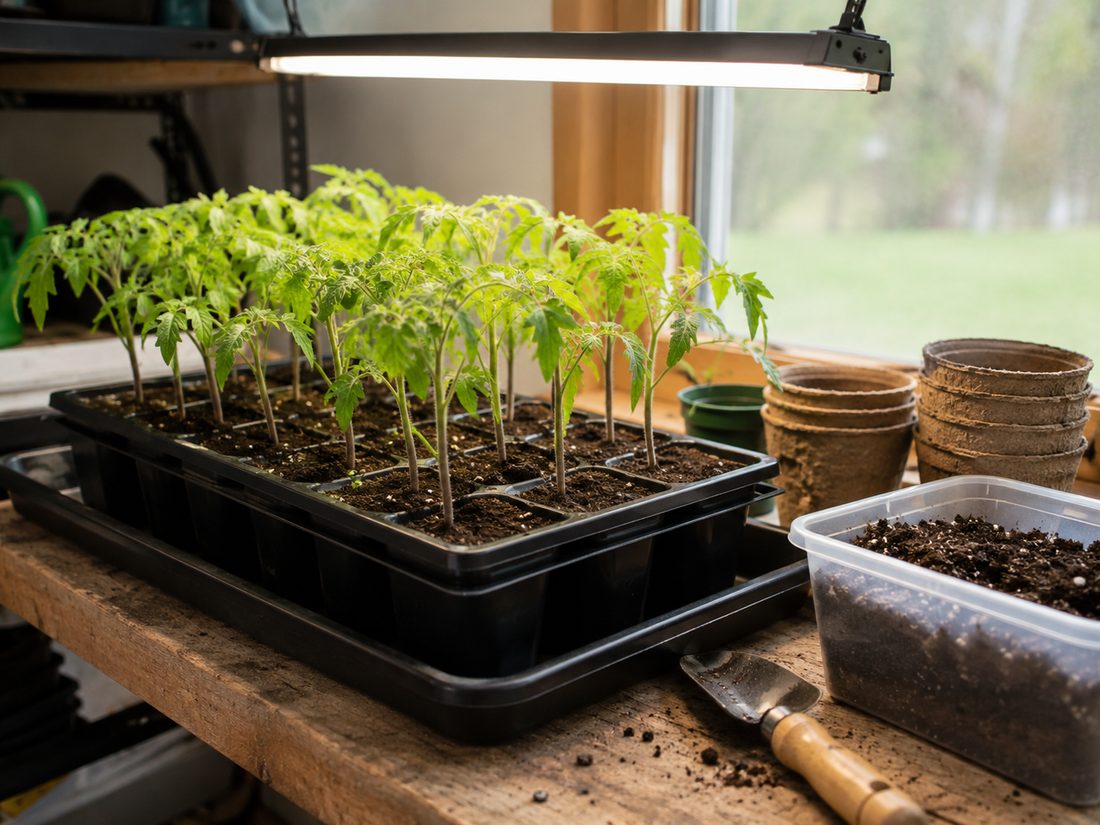
Materials
- tomato seeds
- containers with drainage holes
- sterile seed-starting mix
- plant tags and a marker
- clear humidity dome or plastic wrap
- grow lights
- small fan
- balanced water-soluble fertilizer
Steps
Pick determinate or indeterminate
Most tomatoes grow in one of two ways. Determinate, or bush, types grow to a fixed size. They then stop and ripen most of their fruit in one big flush. Indeterminate, or vining, types keep growing and making fruit right up until frost. Vining types need a stake or a trellis to hold them up. Bush types need far less, and compact ones may get by with a short cage or nothing at all.
Count back from your frost date
Whichever type you choose, sow indoors about 6 to 8 weeks before the last expected spring frost in your area. Sources vary a little on the exact window. If you follow a certain seed supplier or grower, use their timing. Otherwise, use 6 to 8 weeks.
Start sowing on the first day of your window
On the first day of your window, gather your seeds and work through the sowing steps below. Do not start before that. Seedlings started too early grow tall, thin and overgrown, and then struggle to settle in once they go in the ground.
Choose containers that drain
When the timing is right, gather containers with drainage holes. Cell packs, plug trays and small pots all work. So do clean recycled items like yogurt cups and egg cartons.
Sterilize anything reused
Scrub the old soil off any container that has held plants before. Wash it in hot soapy water, rinse it well, and stand it out to air dry before you fill it. This small step heads off damping off, a disease that rots young seedlings at the base.
Fill with sterile seed-starting mix
Fill the clean containers with a light, sterile seed-starting mix. Do not use soil from the garden. Garden soil drains poorly in a small container. It can also carry disease, including the organisms behind damping off.
Aim for about a quarter inch deep
Sow the seeds about 1/4 inch deep in that mix. Anywhere from 1/8 to 1/2 inch will do.
Sow a few seeds per cell
Put 2 to 3 seeds in each cell or pot. That way you are covered if some seeds fail to sprout, and you can leave them all in place for now.
Label every variety now
As you sow, mark each variety. Use a plant tag, a popsicle stick, or tape and a marker. Weeks from now you will not remember which cell holds which.
Cover the trays to hold moisture
Put a clear humidity dome or a sheet of plastic wrap over the labelled trays. This holds in moisture and warmth while the seeds sprout. Take the cover off as soon as you see sprouts.
Keep them warm to germinate
Under that cover, aim for a soil temperature of about 70 to 85°F. That's a commonly cited target range for sprouting tomato seed rather than a hard cutoff, so treat it as what you're steering toward, not a line the seed won't cross.
Keep the tray warm until the seedlings are up
Keep the tray warm until the seedlings are up, setting it on a heat mat if you have one. Warmth from below speeds up sprouting a lot. Take the tray off the heat once they are up, since heat does the seedlings no good after that point.
Keep the seeds in their warm spot until sprouts appear
Leave the seeds where you set them to stay warm. Do not move them to a bright spot yet. A tomato seed needs no light to sprout. Wait until the seedlings have come up before you start giving them light.
Water evenly, never soggy
All through sprouting, keep the mix evenly moist but never soaked. Too much water is one of the leading causes of seedling failure and rot. Water from the bottom instead. That keeps the seeds where you put them and keeps the leaves dry.
Give them 14-16 hours of light
Once the seedlings are up, light does matter. Give them about 14 to 16 hours of bright light a day. Grow lights are ideal. Hang them at the distance the fixture's manufacturer recommends for seedlings, since that varies a lot between weak fluorescents and high-output LEDs. Getting that distance right keeps the stems from stretching without scorching the tops.
Grow them cool and bright
Pair that bright light with cool conditions. About 65 to 70°F makes the sturdiest seedlings. Warmer rooms push tall, spindly growth instead.
Set up a small fan
Run a small fan near the seedlings to keep the air moving. The breeze makes the stems thicker and stronger. It also cuts down on fungal problems like damping off.
Feed after the first true leaves
Do not use fertilizer until the seedlings have put out their first true leaves. True leaves come after the first pair, and they look like real tomato leaves. Then use a balanced water-soluble feed. Dilute it to about half, or even a quarter, of the strength on the label.
Pot up into bigger containers
Move the seedlings into bigger pots of about 3 to 4 inches. Do this when they have about two sets of true leaves, or when they simply outgrow their cells. Set them deeper than they were. Bury part of the stem to encourage more roots.
- Why the stem goes deeper: tomatoes grow roots along any buried part of the stem. The buried section turns into more root, so the plant ends up with a bigger root system. The same trick comes up again at transplant time.
Harden them off gradually
Before the potted-up seedlings go in the garden, harden them off. This means getting them used to outdoor conditions bit by bit. Put them outdoors in shade for a few hours a day. Then steadily give them more sun and more time outside over about 7 to 10 days.
Wait for warm soil to transplant
Plant them out only once all danger of frost has passed. The soil must have warmed to around 60°F. Night temperatures must also hold steadily above 50°F.
Bury the stem deep
Set each plant deep enough that the soil comes up to its lowest set of leaves. Tomatoes grow roots along any buried part of the stem. So deeper planting builds a bigger root system. For what comes after, see how to plant tomatoes.
Save seed only from open-pollinated varieties
Check that the variety you sowed was an heirloom or open-pollinated one before you save any seed from this crop. Open-pollinated means the seed grows into a plant like its parent. Seed saved from hybrid plants, also labelled F1, will not come true to type next year. Here is .
- How to check whether the variety you sowed is open-pollinated
- Find the packet you sowed from Dig out the seed packet for that variety. If you have thrown it out, find the catalogue page, the website listing, or the order confirmation instead.
- Look for hybrid wording Read the variety name and the description for the word hybrid or the code F1. Either one means the plant is a hybrid and its seed will not come true.
- Look for open-pollinated wording Now look for heirloom, open-pollinated, or the short form OP. Any of those means saved seed will grow into a plant like the parent.
- Look the variety up if it says neither Some packets say nothing either way. Search the variety name on the seed company's own site or in a seed catalogue, since most of them state the type for every variety they sell.
- Decide before you save any seed If the variety is heirloom or open-pollinated, go ahead and save seed from it. If it is a hybrid, or you still cannot tell, buy fresh seed next year instead.
Months later, save seed from a ripe fruit
Once a fruit has fully ripened, months after you plant out, scoop its pulp and seeds into a container and leave it to ferment for a few days, until a layer of mold forms on top and the seeds settle to the bottom. Rinse the seeds, then dry them thoroughly before you store them.
Tips
- Did your seedlings come out tall and floppy even with good light? Look at the heat, not the lamp. The usual cause is a heat mat left on after the sprouts appear, or a room warmer than about 70°F. Watch for that next time.
- Grow a couple of varieties rather than a whole flat of one. Determinate types give you a single big harvest that is worth canning. Indeterminate types keep the kitchen supplied until frost.
- Recycled yogurt cups and egg cartons cost nothing. They work as well as bought cell packs. Just punch drainage holes in them. Use fresh ones, so there is nothing to scrub off.
Sources
Each step in this guide is drawn from facts stated by several of these pages independently. Sources that did not corroborate anything used here are not listed.
- How To Start Tomato Plants From Seed (Updated August 19th) progardenreview.com
- How to Grow Tomato Seeds Indoors foodgardenlife.com
- Step-by-Step Guide to Starting Tomatoes from Seed 104homestead.com
- Growing Tomatoes From Seed - The Complete How To Guide getbusygardening.com
- Tomato Seed Starting: Pro Tips - Harvest to Table harvesttotable.com
- Growing Tomatoes from Seed to Harvest gardeners.com
Leave a comment
Comments are reviewed before appearing. See our Privacy Policy for how your name and message are handled.
Comments
No comments yet.