How to Plant Tomatoes
Tomatoes do well when you give them a little extra care at planting time. Get the basics right at the start. Then you can spend the rest of the season harvesting instead of fixing problems.
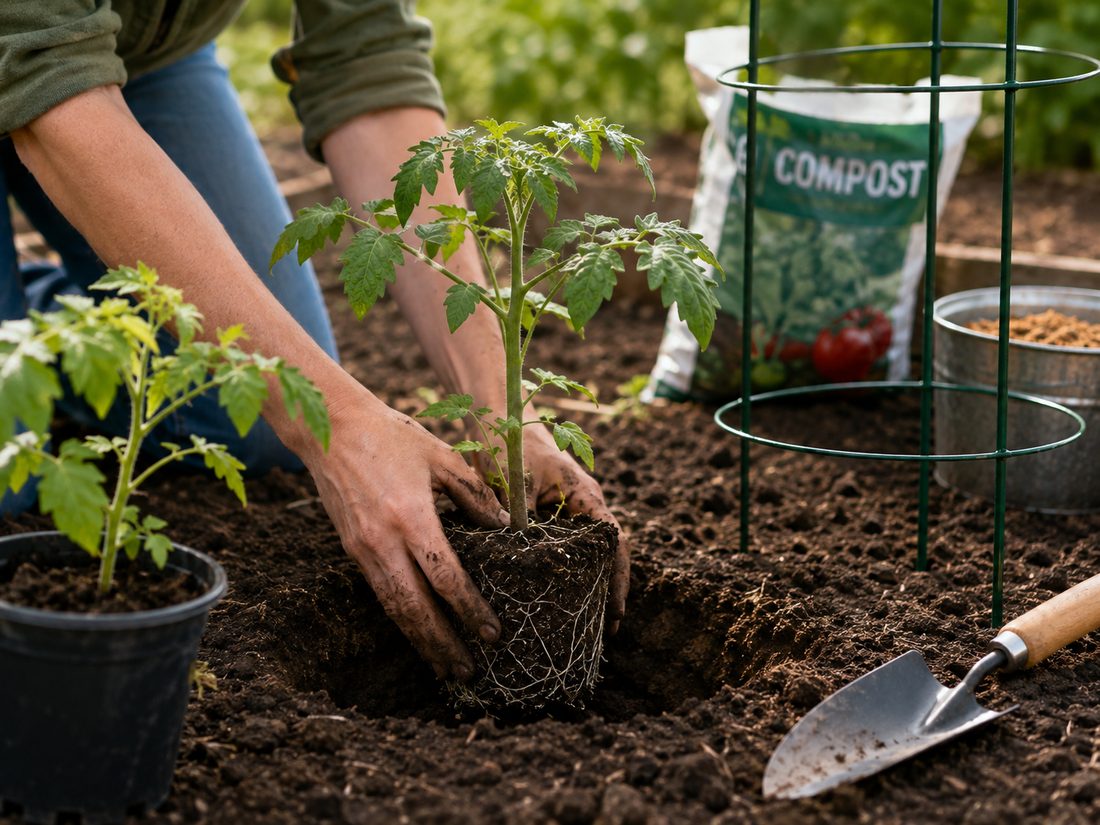
Materials
- Tomato seedlings
- Garden trowel
- Compost or aged manure
- Bone meal (optional)
- Stakes or cages
- Mulch (straw or similar)
Steps
Harden off your seedlings
Harden off your seedlings before you move them outdoors. This means getting them used to outdoor conditions slowly, over about a week. Start with just a few hours a day in a shady, sheltered spot. Each day, leave them out for longer and in more sun. A slow start means the move outdoors will not shock the plant.
Time it right
Wait until all danger of frost has passed. Nighttime air must stay above about 50 degrees Fahrenheit, or 10 Celsius. Also wait until . Air temperature on its own can fool you.
- How to Take Your Soil's Temperature
- Use a probe thermometer A soil probe or an instant-read kitchen thermometer both work. A thermometer laid on the surface does not - it reads the air and the sun on the metal, not the soil.
- Push it in to root depth Insert the probe four to six inches down, where the roots will actually sit. The top inch warms first and will tell you the bed is ready before it is.
- Read it first thing in the morning Take the reading early, before the sun has been on the bed. That is the day's low, and the overnight low is what a young transplant has to survive.
- Use several mornings, not one Check the same spot for a few mornings running and go by the pattern. One warm afternoon does not mean the soil has held its heat.
Choose a sunny spot
Pick the sunniest spot you have. Tomatoes want at least 6 to 8 hours of direct sun a day.
- Do not replant in the same spot. Avoid any bed that has grown tomatoes in the past two to three years. The same goes for their relatives, such as peppers, eggplants and potatoes. Moving them to a new spot each year stops soil-borne diseases from building up. Soil-borne means the disease lives in the soil.
Space your plants
Give each plant room to grow. Space the plants about 18 to 36 inches apart. This lets air move freely between them.
Loosen the root ball
Squeeze the sides of the pot gently to loosen the root ball. Then slide the plant out. If the roots have started to circle the pot, tease them apart a little. Now the seedling is ready for its hole.
Pinch off the lower leaves
Pinch off the lower leaves of the seedling. No leaves should end up buried in the soil. Buried leaves will simply rot.
Plant it deep
Most vegetables do not like this, but tomatoes do. Plant them deep. Bury the stem all the way up to its lowest set of leaves. Roots will grow anywhere along the buried stem. That gives the plant a stronger foundation.
- Is your seedling leggy, meaning tall and thin? Do not force it into a deep, straight-down hole. How to Trench-Plant a Leggy Seedling
- Dig a shallow trench Scrape out a trench two to three inches deep and long enough to take most of the stem lying down, instead of digging a deep vertical hole.
- Strip the leaves that will be buried Pinch off every leaf along the length of stem that is going under. Buried leaves rot; the bare stem puts out roots along its whole length.
- Lay the plant on its side Set the seedling into the trench sideways with only the top few inches of growth standing clear of the soil.
- Curve the tip up gently Bend the exposed tip upright and prop it with a little mounded soil. Do not force it straight - if it only half turns, the plant will finish the job toward the light within a few days.
- Backfill and water in Cover the trench, firm the soil lightly over the buried stem, and water to settle it.
Feed the hole
Work a handful of compost into the planting hole. Mix in bone meal or a similar soil feed as well. This gives the plant a head start.
Water it in
Water the seedling well as soon as you have planted it. Do not wait for the next watering day. Give it enough water to settle the soil around the roots. This also removes any air pockets.
Add support
. Do not leave it until later. By then the roots have spread, and you may damage them.
- How to Set a Stake or Cage Without Damaging Roots
- Put the support in before the plant Drive the stake or seat the cage while the planting hole is still open and there are no roots in the way to hit.
- Set it a hand's width from the stem Position it four to six inches from where the stem will sit: close enough to tie to, far enough out to miss the root ball.
- Drive it deep enough to hold a loaded plant Sink a stake at least a foot into the ground. A fruiting tomato in wind is heavy, and it will lever a shallow stake out of soft soil.
- Peg a cage down A cage resting on the surface tips over once the plant fills it. Push its legs well in, or peg it, so it is anchored rather than balanced.
- Tie loosely, and only as it grows Use soft ties in a figure-eight, with the crossover between stem and stake so the two never rub. A tie pulled tight against the stem will cut into it as the plant thickens.
Mulch the bed
Wait until the soil has warmed. Then spread a layer of mulch around the base of the plant. Mulch holds moisture in and keeps weeds down. It also stops soil from splashing onto the lower leaves.
Tips
- First, it helps to know what you are growing. Determinate tomatoes, also called bush tomatoes, stay compact. They ripen most of their fruit at once. Indeterminate tomatoes, also called vining tomatoes, keep growing and fruiting until frost. They need sturdier support.
- Are you growing in a container instead of the ground? Use a pot that holds at least 5 gallons per plant. Bury the stem a little less deep than you would in open soil. Containers drain less freely. If you plant too deep, the crown of the plant can rot.
- Water at the base of the plant, not over the leaves. Do this right after planting and all season long. Dry leaves go a long way toward preventing disease. Once the plants are established, give them about 1 to 2 inches of water a week. A couple of deep soakings work better than a little water every day.
- A newly planted seedling often looks a little wilted for the first few days. This is normal, above all in warm or sunny weather. The plant is busy growing roots. Do not give it extra water. Just keep the soil evenly moist while it settles in.
Sources
Each step in this guide is drawn from facts stated by several of these pages independently. Sources that did not corroborate anything used here are not listed.
- 10 Tips for Growing Tons of Tomatoes | The Old Farmer's Almanac almanac.com
- How to Plant Tomatoes: A Step-by-Step Guide - Growing In The Garden growinginthegarden.com
- How to Grow Tomatoes - Better Homes & Gardens bhg.com
- Growing Tomatoes for Beginners | The Maker Makes themakermakes.com
- How To Plant Tomatoes the Best Way (Tips for Success) rootsandrefuge.com
- Growing Tomatoes at Home - Extension Gardener extensiongardener.ces.ncsu.edu
Leave a comment
Comments are reviewed before appearing. See our Privacy Policy for how your name and message are handled.
Comments
No comments yet.