How to Tie a Bowline Knot
The bowline makes a fixed loop at the end of a rope. The loop keeps its size under load, and the knot is still easy to untie afterwards. This guide covers how it is tied.
Precautions
- A bowline can shake loose when the load comes off and on again. That happens even to one that has held a heavy load without trouble.
- Do not use it where a fall or a life depends on the knot holding. That means no climbing, no rescue work, and nothing that takes a person's weight.
- Do not leave one holding a load unattended. Back it up with a strangle knot around the standing end, and check it whenever you pass.
Materials
- A length of rope (paracord works well for practice)
Steps
- The word "bowline" is said "boh-lin". It rhymes with "so". It is not said like the "bow" of a ship. It comes from the Middle English word "boweline", first written down around 1294. Back then it named a rope on square-rigged sailing ships. That rope held the edge of a sail toward the bow, so the wind could not blow the sail back against the mast. The knot used to secure that rope later took the same name.

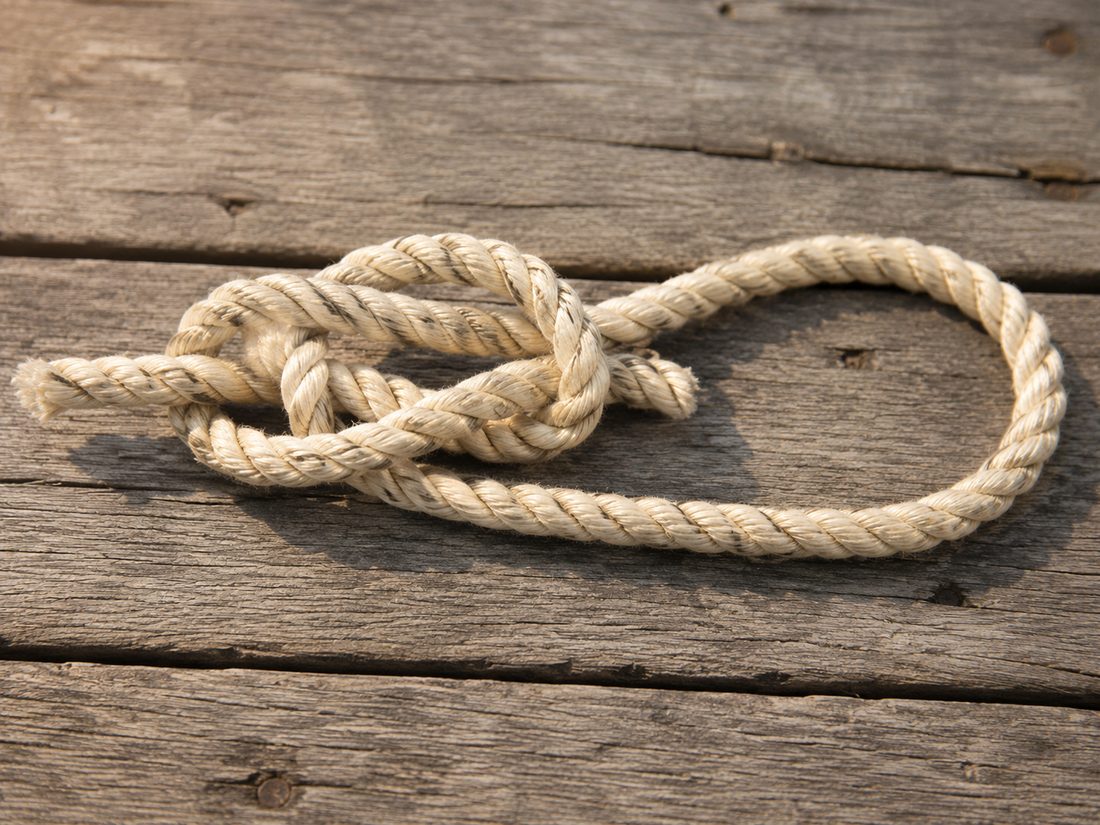
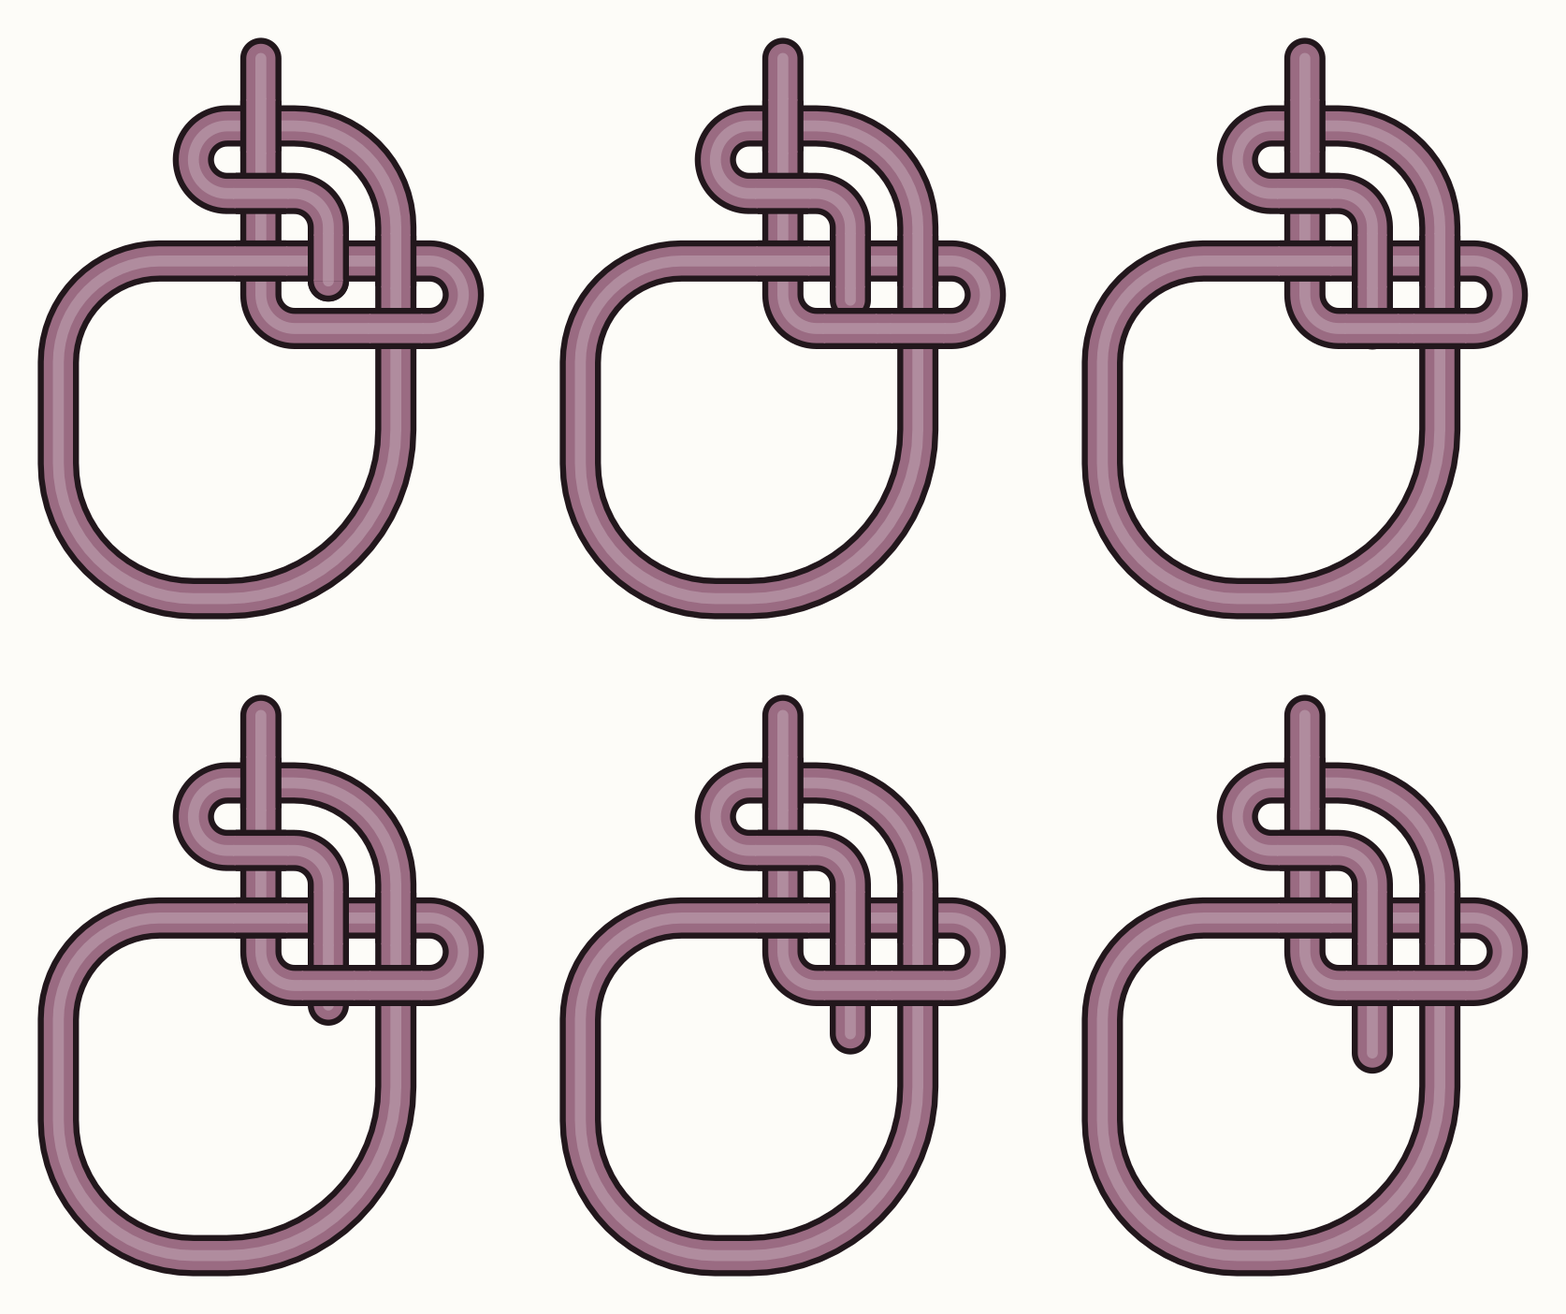
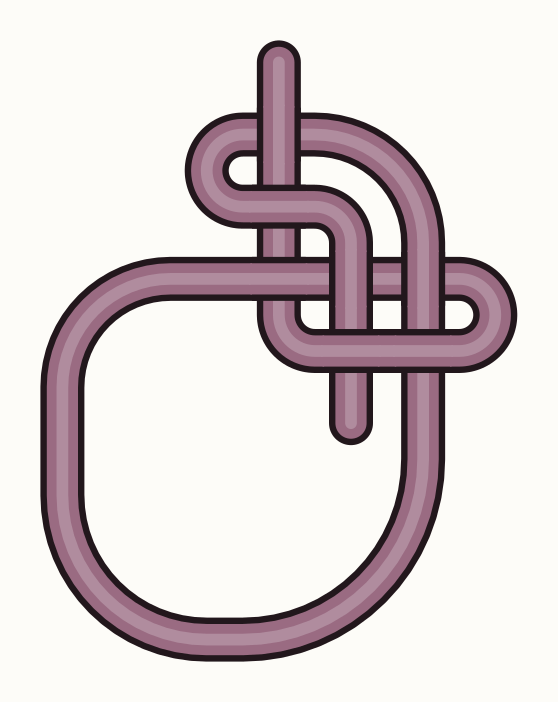
The whole knot, once through. The working end finishes inside the loop, which is what holds a bowline together. 
Form the loop
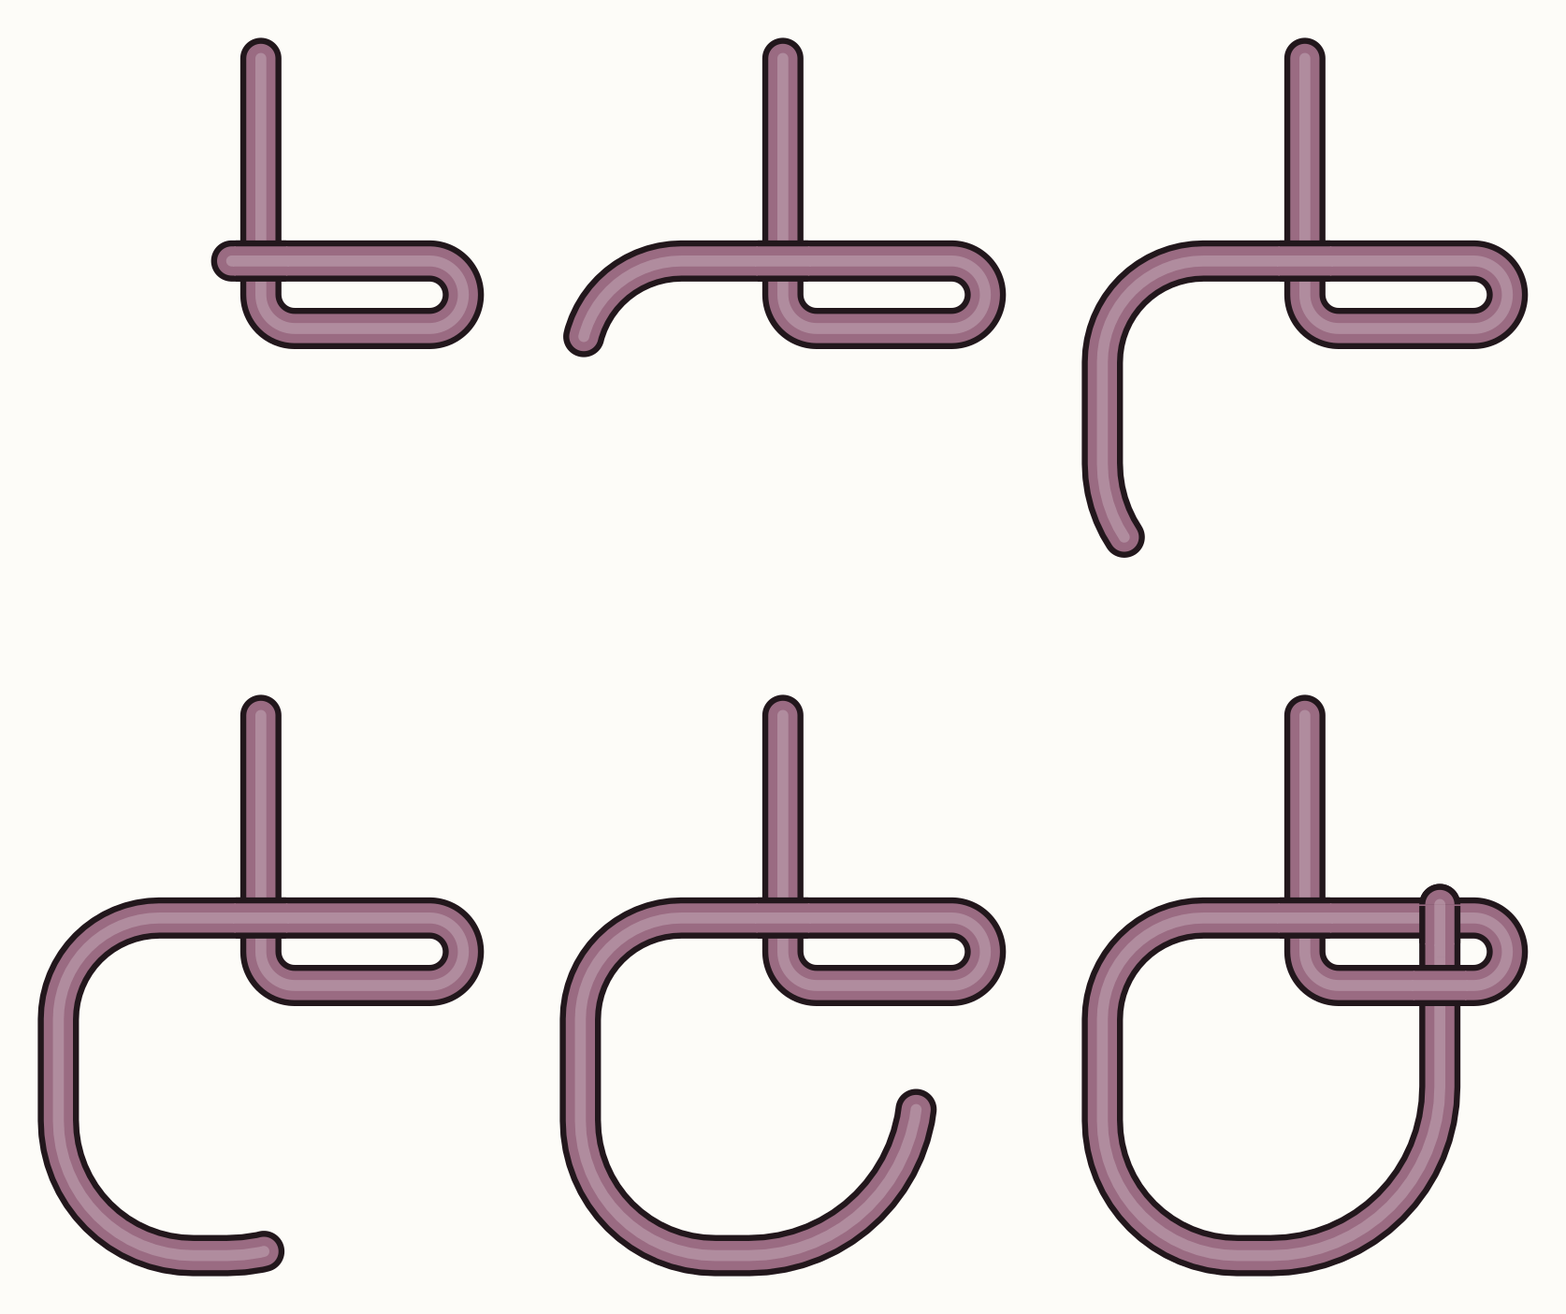
Make a small loop in the rope. Leave enough working end for the size of loop you want. The working end is the short end that you tie with.
Thread the working end up
Pass the working end up through the loop from underneath.
Wrap around the standing end
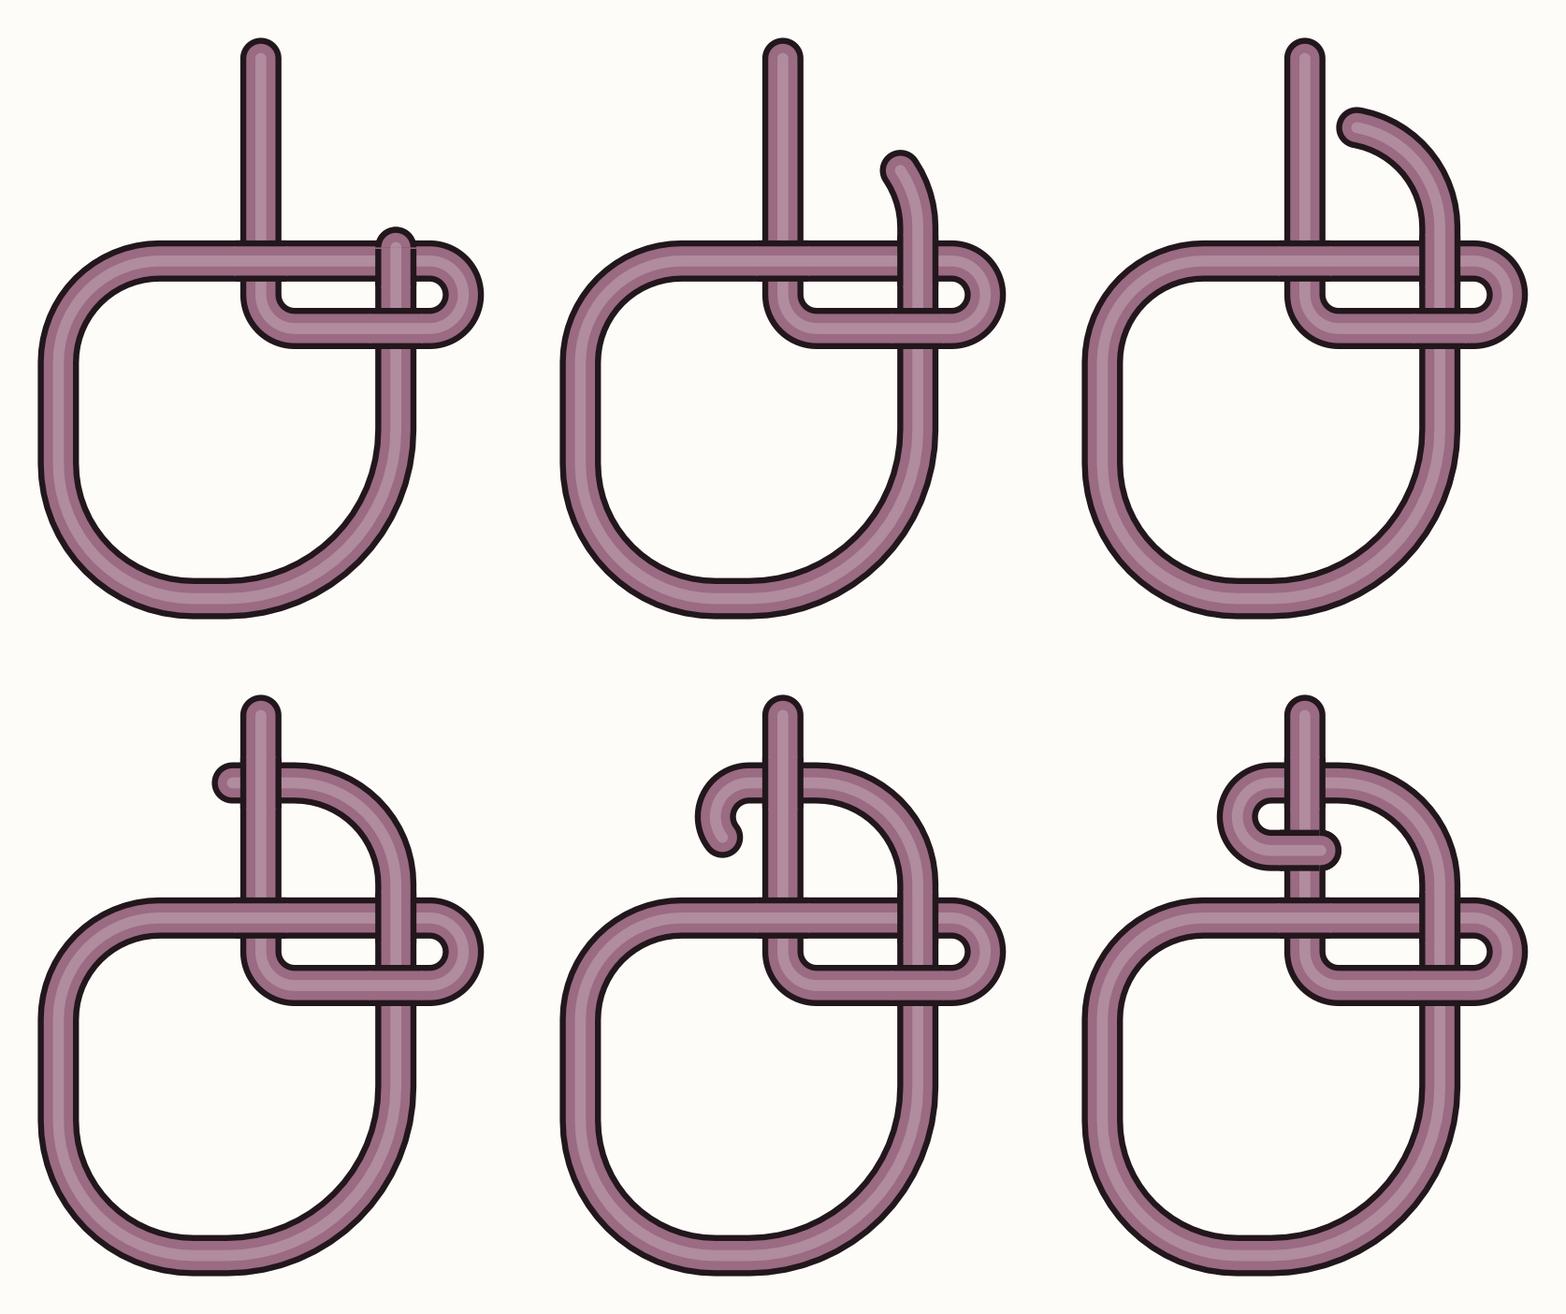
Bring the working end around behind the standing end. The standing end is the long part of the rope.
Thread it back down
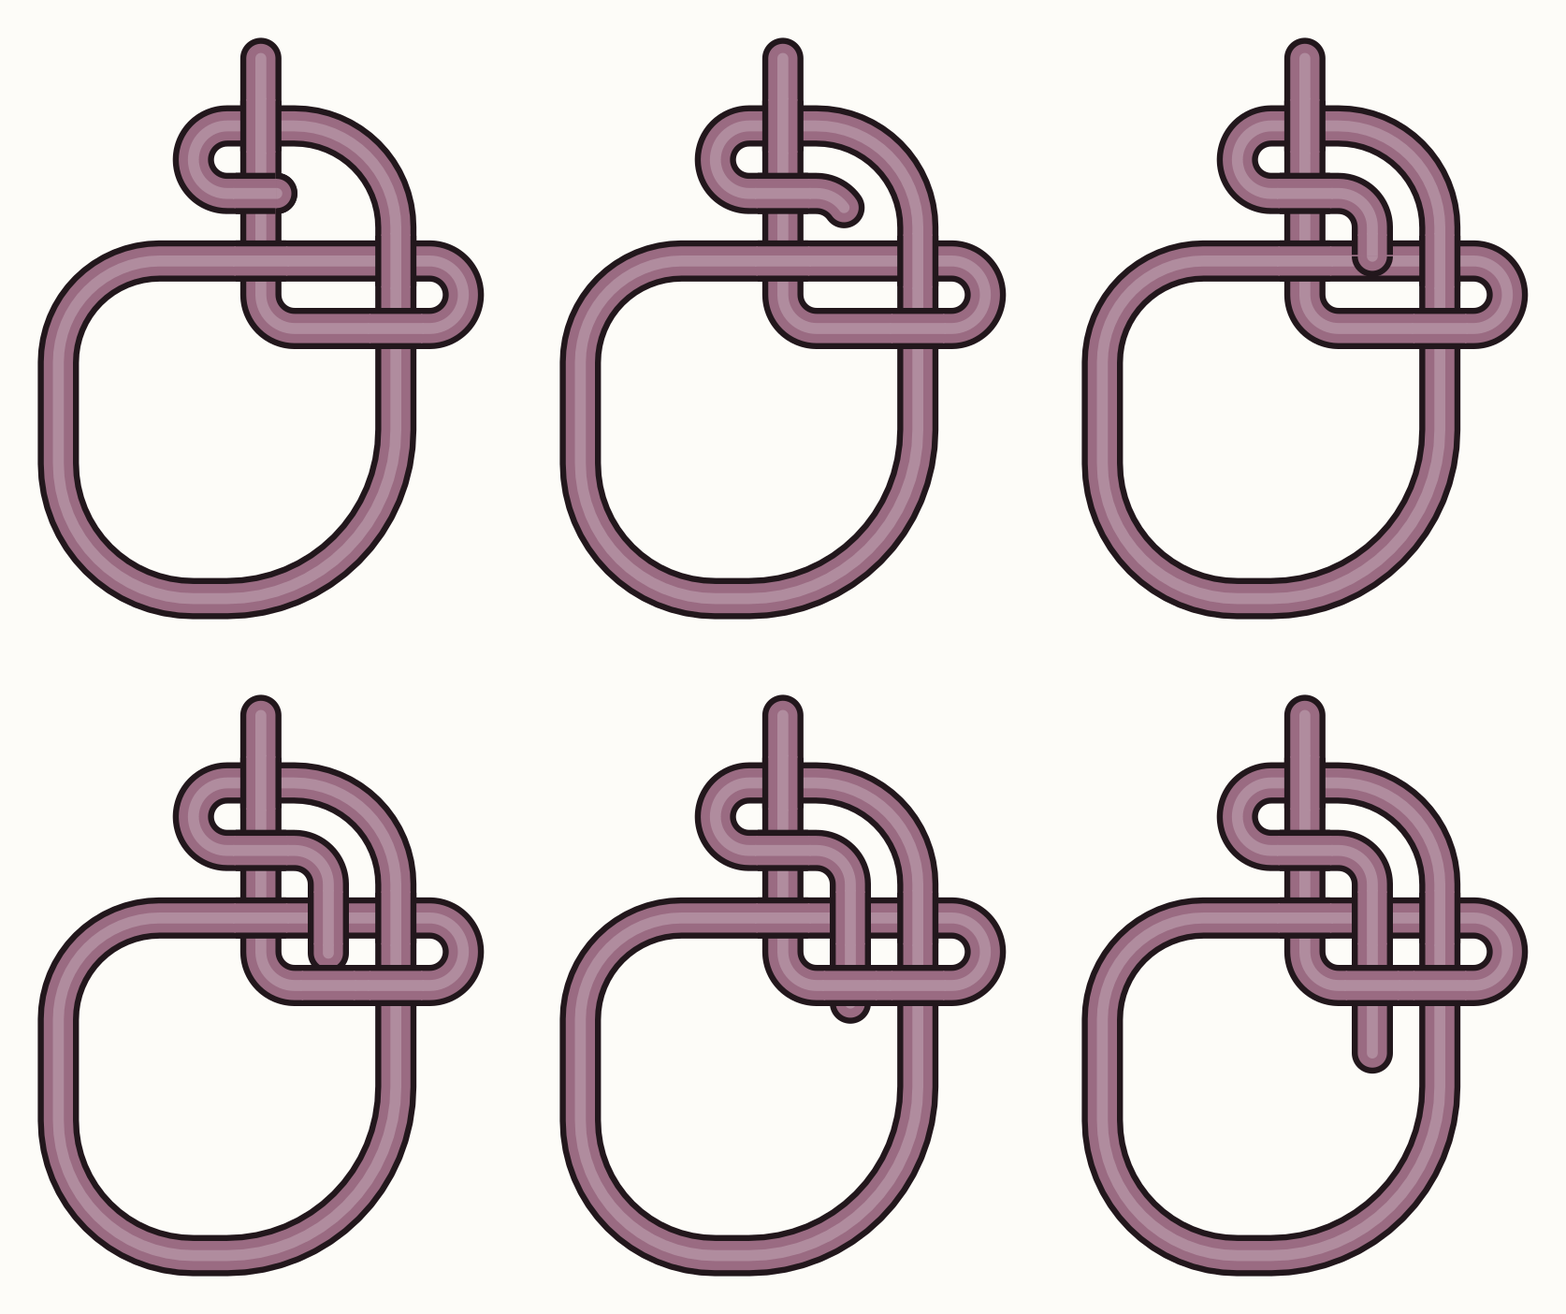
Pass the working end back down through the same loop you started with.
Check it and dress it
Check that the working end has ended up inside the loop. If it is on the outside, you have tied a slipped version instead. Undo it and start again. Then push the strands neatly together against each other while the knot is still loose.
Pull it tight and set it
Pull the standing end to tighten the knot. Then pull firmly on both the standing part and the loop to set it. Leave a tail long enough that it will not slip. Make it about 12 times the rope's circumference, which is the distance around the rope.
- Every knot makes the rope weaker, and the bowline is no exception. Even when it is tied and tidied well, it usually keeps only about 60% of the rope's full breaking strength. Breaking strength is the load an unknotted rope can take before it snaps. The tight bend where the knot pulls in concentrates stress that a straight length of rope never has to handle. The exact number changes with the type of rope, its thickness, and how snugly the knot is tidied. So always use rope rated well above the load you expect to put on it.
Tips
- Here is a classic memory aid. Picture the loop as a rabbit hole. The standing end is a tree. The working end is a rabbit. The rabbit comes up out of the hole, goes around the tree, and goes back down the hole.
- Practice until it becomes automatic. Tie it, untie it, and repeat about 50 times, until your hands know it without thinking. Being able to tie it without looking is worth building.
Sources
Each step in this guide is drawn from facts stated by several of these pages independently. Sources that did not corroborate anything used here are not listed.
- Master the Bowline Knot: 10+ Variations for Every Situation knotspedia.com
- How to Tie a Bowline Knot? Tips, Steps, Uses & Video Instructions 101knots.com
- How to tie a Bowline Knot using Step-by-Step Animations animatedknots.com
- Bowline | How to tie knots3d.com
- How to Tie a Bowline Knot (A Quick, Illustrated Guide) theknotsmanual.com
- Bowline - How to tie a Bowline Knot animated and step by ... - NetKnots netknots.com
Leave a comment
Comments are reviewed before appearing. See our Privacy Policy for how your name and message are handled.
Comments
No comments yet.