How to Tie a Strangle Knot
The strangle knot holds something round shut. Use it on the neck of a sack, a rolled-up mat, or a bundle of poles. It is two turns and a tuck. It lies flat instead of bunching up. The tighter you pull it, the harder it bites.
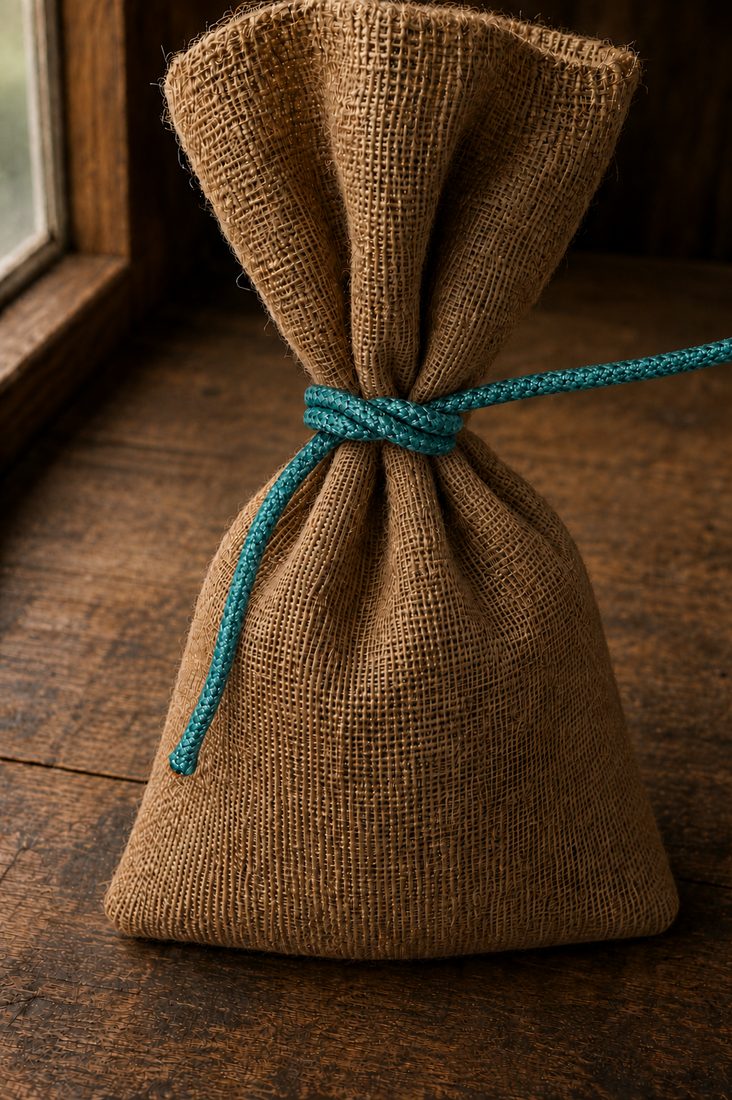
Materials
- A length of cord or rope
Steps
- This knot only grips a rounded surface. Use it on a pole, a bar, a rolled bundle, or the gathered neck of a sack. On something flat or square it has nothing to bite on. It will slide loose. Use a different binding there.

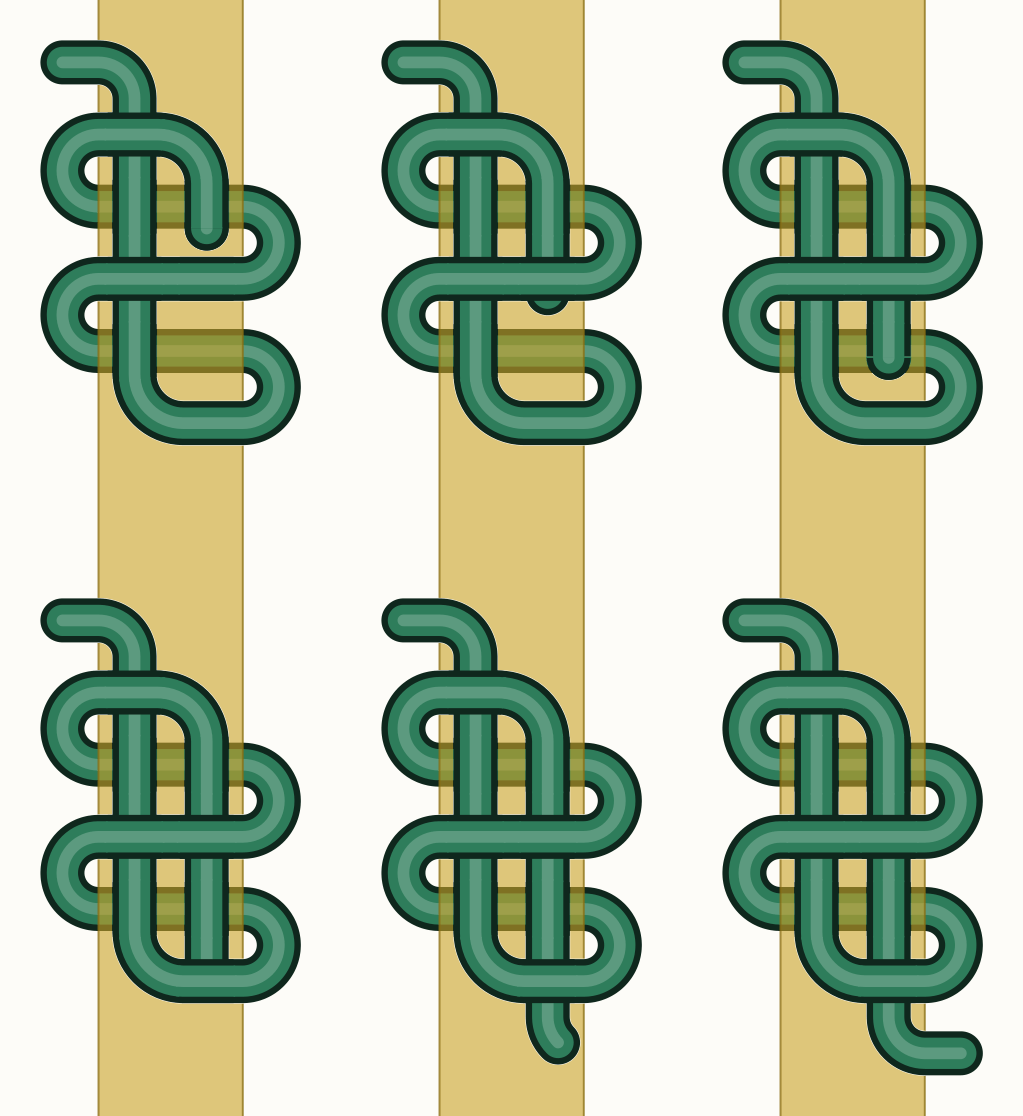
The whole knot, once through, on the pole it grips. The pole is drawn see-through so the turns behind it can be followed. 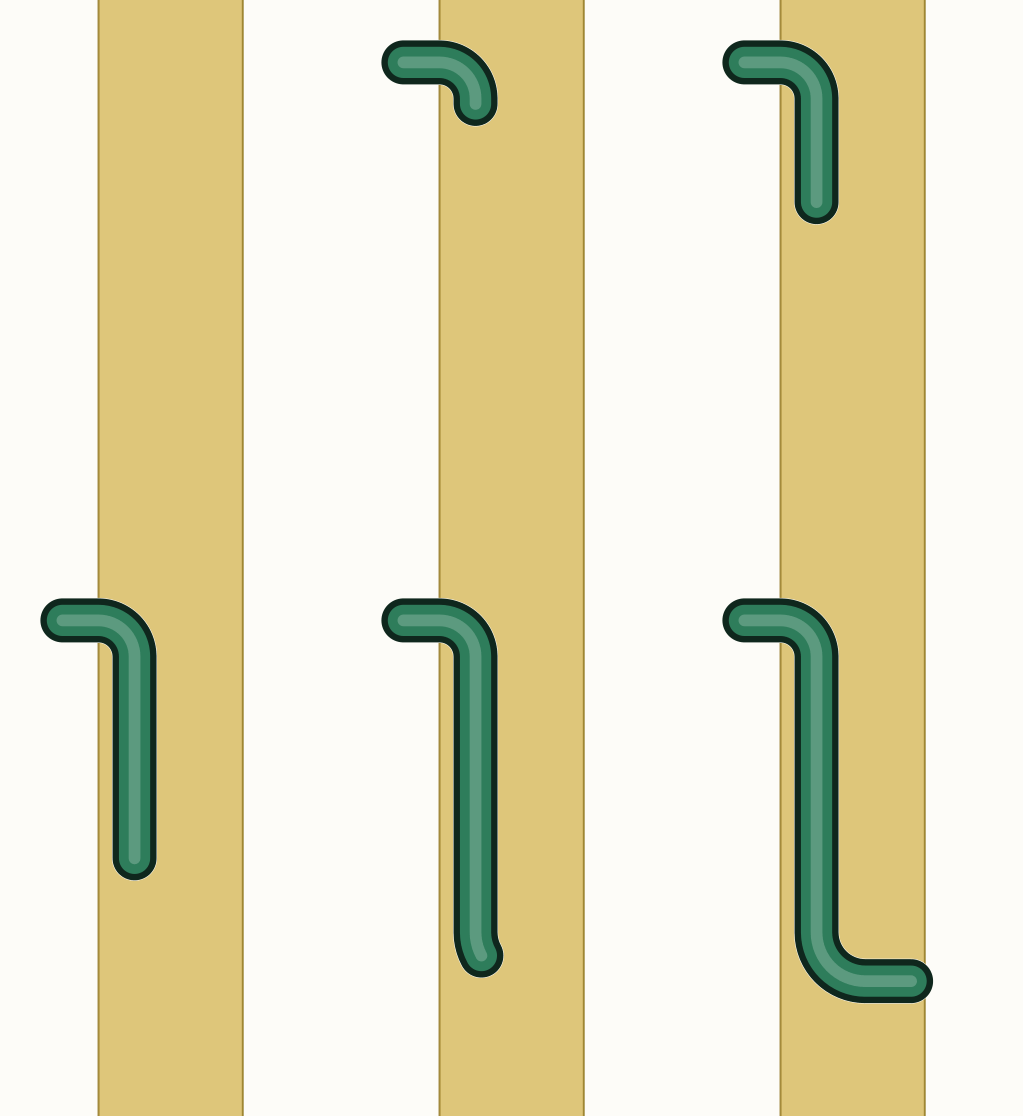
Make the first turn
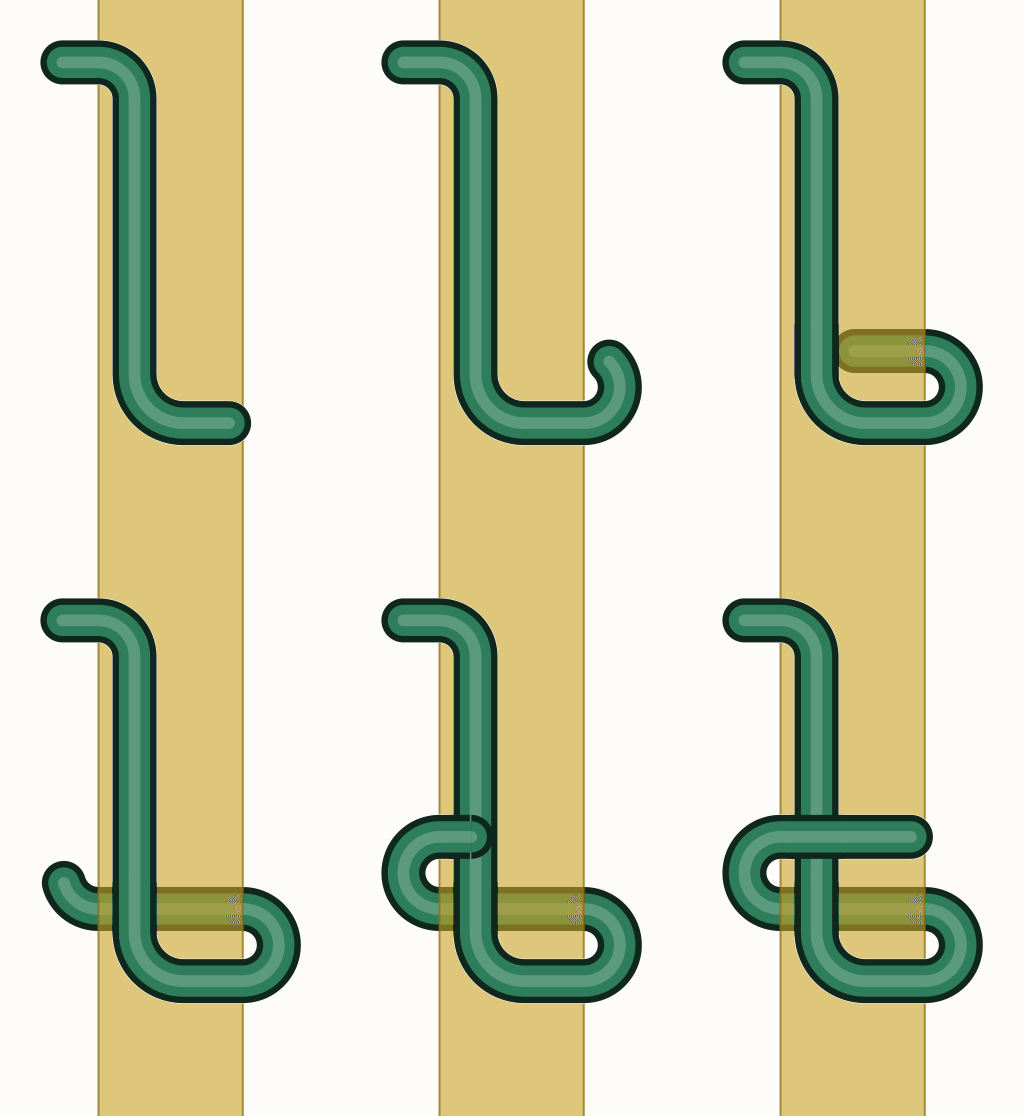
Pass the working end all the way around the object. The working end is the end you are tying with. Bring it back across the standing part at the front. The standing part is the rest of the rope. The two parts now cross where you can see them.
Make the second turn
Take the working end around the object a second time. Lay this turn neatly beside the first one. The two wraps should sit flat against each other.
Tuck the end under both turns
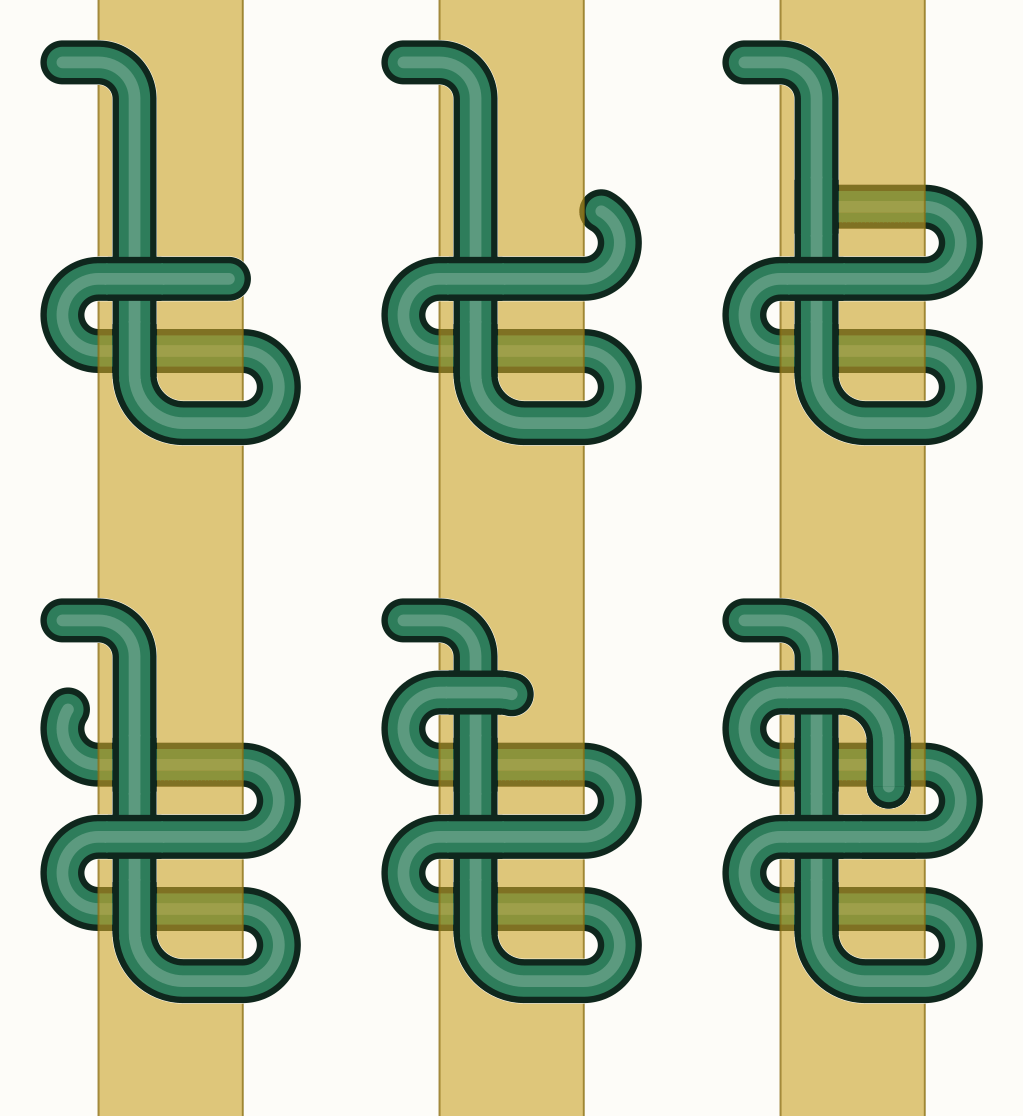
Feed the working end under both turns. Pull it through.
- Check where the ends come out. On a strangle knot they come out at the outside edges of the knot. If they come out from between the turns, you have tied a constrictor knot. That is not a worse knot. It actually grips harder. But it is far more stubborn to get off again. Tie it again if you wanted the strangle knot.
Draw it up and check the lay
Pull on both ends to draw the knot up tight. The two turns should bed down against the object. If you tied it right, the tuck locks underneath both turns. If the end lies beside the turns instead of under them, you have tied a half knot. A half knot is less secure. Shake it out and tie it again.
Tips
- Add one or two more turns before you tuck the end. The same knot then holds a frayed rope end together. It will do until you can whip the end properly. Here is How to Put a Temporary Whipping on a Frayed Rope End
- Start it like a strangle knot Lay a length of thin twine against the rope a finger's width back from the frayed end, pass it around the rope and cross it over itself at the front - exactly the way you start a strangle knot.
- Add a turn or two more than usual Carry on wrapping, laying each turn snugly beside the last rather than on top of it. One or two turns beyond the strangle knot's two is what makes it a whipping - three or four in total, covering the frayed part.
- Tuck the end under every turn Feed the working end of the twine back underneath all of the turns and pull it through, so it emerges at the outside edge of the binding rather than between the turns.
- Draw it up, and know what it is for Pull both ends firmly so the turns bed down into the rope's surface. This is enough to stop an end unravelling and get the rope through a job - it is a temporary repair, and a sewn whipping is what holds for the long run.
- If the binding must not move at all, use the constrictor knot. It grips harder. The strangle knot is the flatter, tidier one. It also comes off again more easily. That is usually what you want on a sack you plan to open.
- This knot is stubborn to undo once it has been pulled tight. Tuck a bight of rope under the turns instead of the end itself. A bight is a folded loop of rope. This gives you the slipped version. It holds the same way. It pulls free with a tug on the tail.
- Drawn up hard, this knot can bind so tight that cutting it off is the only way back. Cut the binding strand where it crosses over another strand. Then there is rope between the blade and whatever you bound. Do not cut where the strand lies directly against the object.
Sources
Each step in this guide is drawn from facts stated by several of these pages independently. Sources that did not corroborate anything used here are not listed.
- Strangle Knot – Using End animatedknots.com
- Strangle Knot | How to tie knots3d.com
- How to tie a Strangle Knot illustrated and animated - NetKnots netknots.com
- How to Tie the Strangle Knot Step by Step | Knotspedia knotspedia.com
- How to Tie a Strangle Knot - The Knots Manual theknotsmanual.com
Leave a comment
Comments are reviewed before appearing. See our Privacy Policy for how your name and message are handled.
Comments
No comments yet.