How to Tie a Stopper Knot
A stopper knot is a small knot you tie in the end of a rope. It stops the end slipping through a hole, a block, a device, or another knot. The figure-eight is the knot most people mean by a stopper. It is quick to tie, easy to recognise, and good enough for everyday jobs. This guide shows you how to tie one. Then it shows you how to check that it works.
Materials
- A length of rope (paracord works well for practice)
Steps

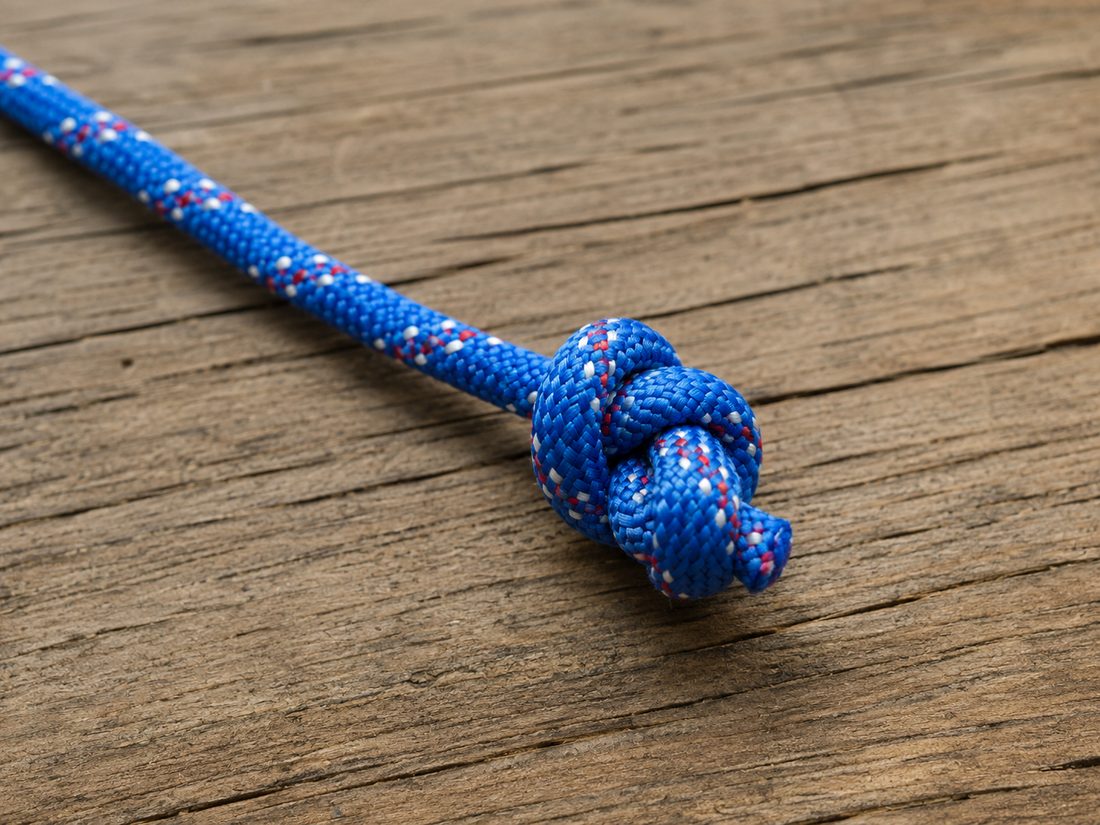
The whole knot, once through. It ends as a bulky stopper that will not pull back through an opening. 
Form a loop in the end
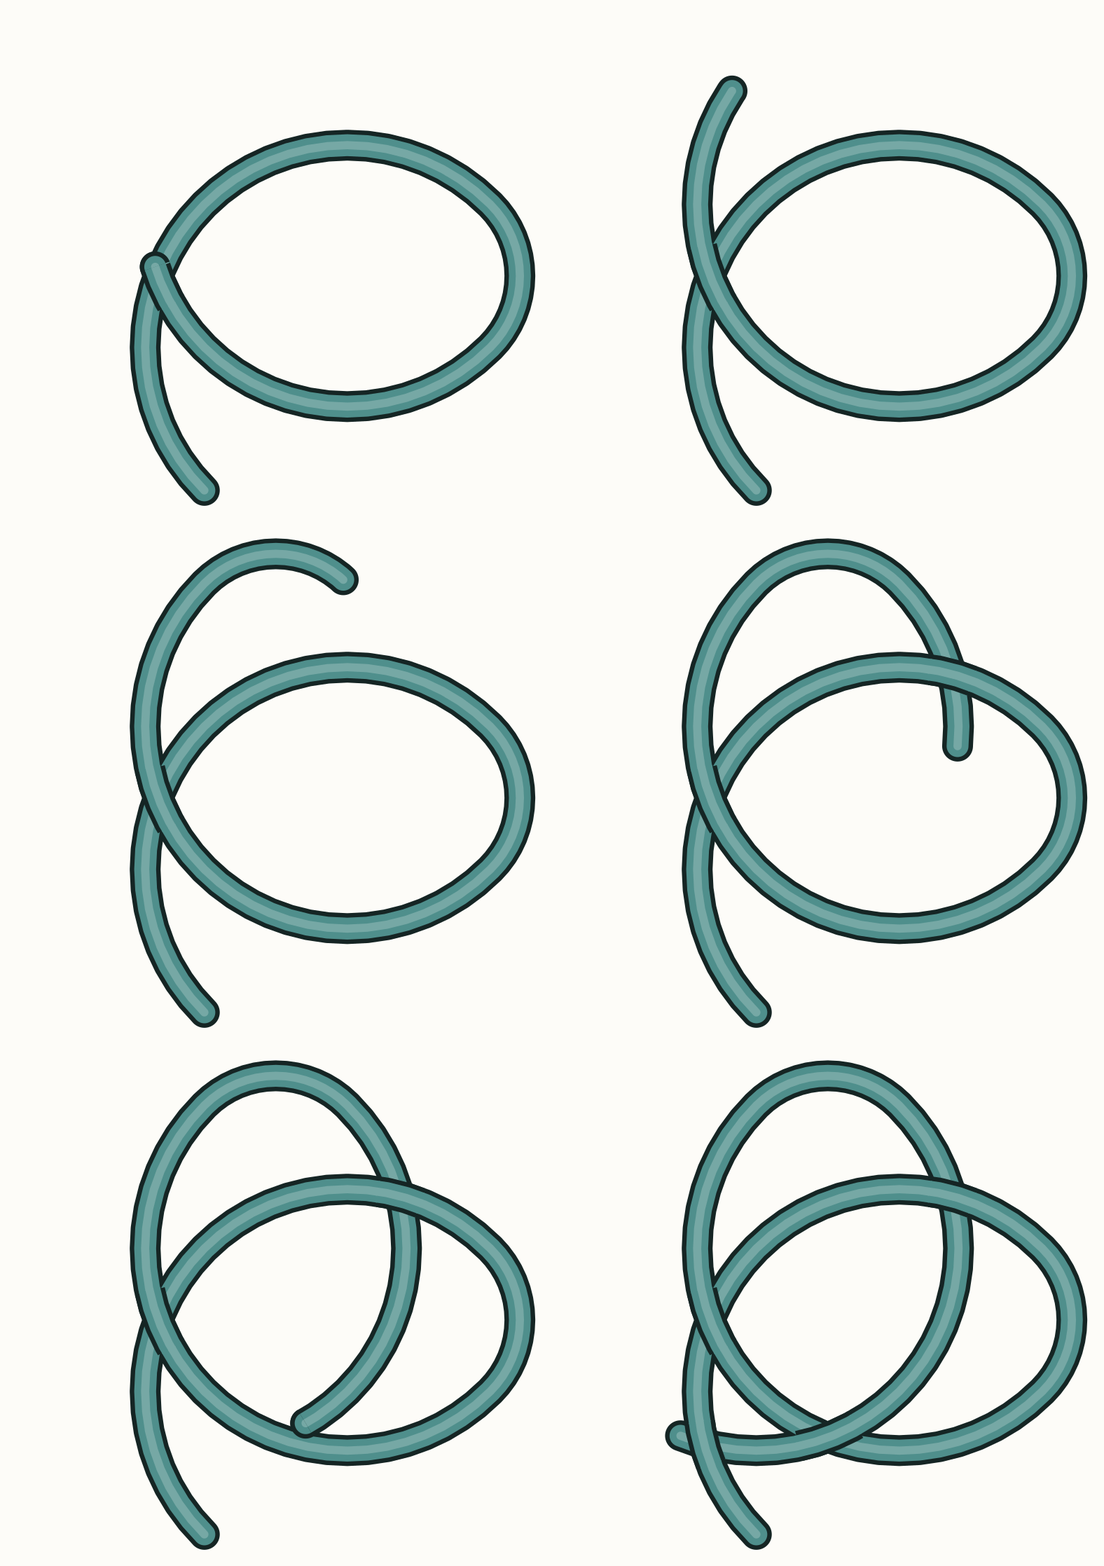
The standing part is the long part of the rope. The tail is the short end. Cross the tail over the standing part, so a loop sits between them. Work far enough back from the end. You need a good length of tail to work with.
Take the tail behind the standing part
Carry the tail on past the crossing. Then take it behind the standing part, so it wraps halfway around. Half a turn is all you want here. A full turn around the standing part gives you a figure-nine instead.
Thread it down through the loop
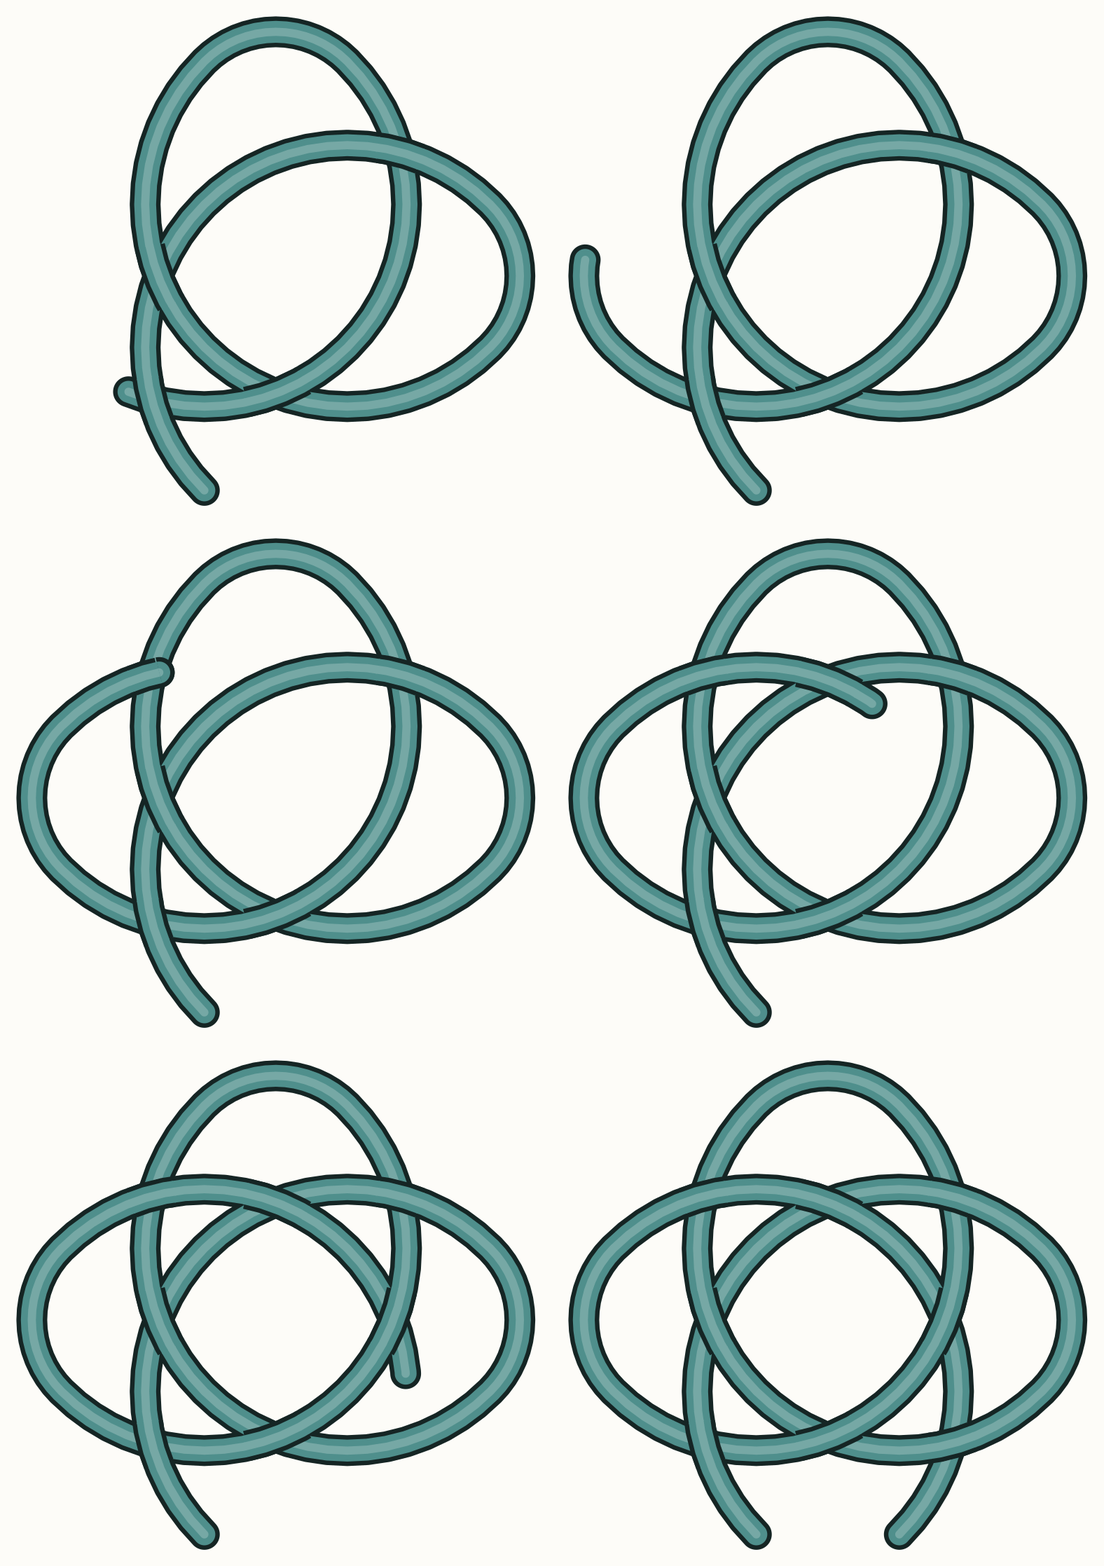
Bring the tail back down through the loop you made in the first step. The knot is now formed. It is still loose.
- Check the shape before you tighten. A finished figure-eight makes a clear 8, and the tail passes behind the standing part once before it goes down through the loop. If the tail went straight down through the loop with no pass behind, you tied a plain overhand. If it went a full turn around the standing part, you tied a figure-nine. Counting crossings is a poor test, because a loose knot easily shows an extra one. Trace the tail instead. Loosen the knot and tie it again. Do not tighten a knot you cannot name.
Dress the knot and pull it tight
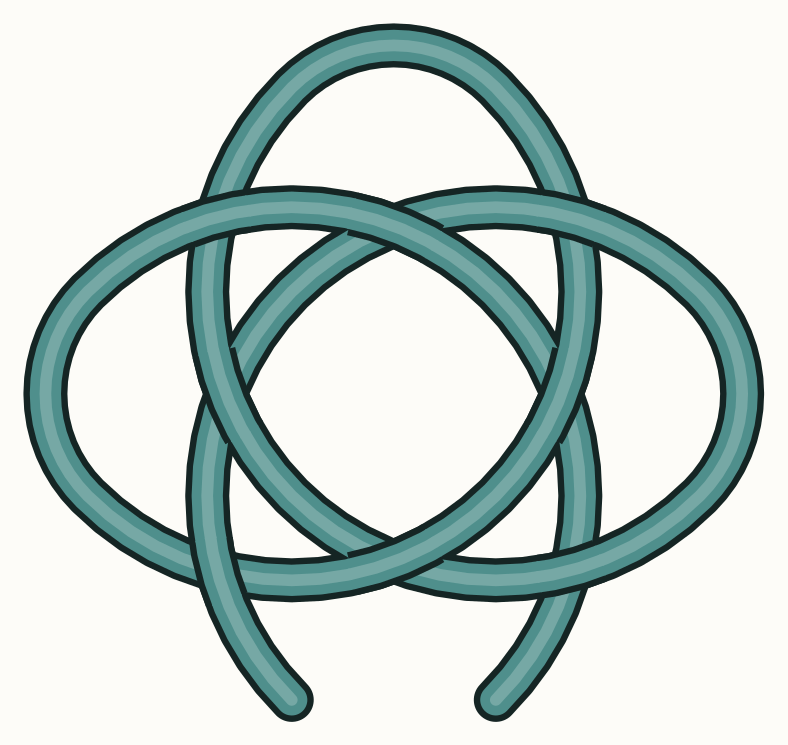
Dressing a knot means tidying the strands. Lay them neatly side by side, not crossed or bunched. Then pull the standing part and the tail apart to tighten it. A loosely dressed stopper shakes itself loose surprisingly fast.
Test it against the opening
Pull the rope firmly back against the hole, block, or device that the knot must stop it passing through. Check that the knot is clearly bigger than the gap. If it still pulls through, tie a bulkier double overhand in its place.
Tips
- Do not use the plain overhand. It is the quickest stopper to tie, but it is also the smallest. So it is the most likely to pull straight through the opening you wanted to block. It also binds down very tightly after a hard load, which makes it hard to undo. The figure-eight takes one extra move. It gives you a bigger, tidier knot.
- Sometimes a figure-eight still pulls through the opening. The Ashley stopper is the usual answer. It is also called the Oysterman's stopper. It uses very little rope. It finishes as a fat knob with three lobes, which resists pulling through much better than the common stoppers.
- Tie the knot a little way back from the very end of the rope. Leave a generous tail. Do not tie it right at the tip. A stopper sitting a few inches from the end can simply roll off under load.
- This guide is for everyday rope work only. It does not cover climbing, abseiling, rescue, rigging, or anything holding a load above a person. Do not use what is here for those. A rope letting go there can kill somebody, and the knots and checks that job needs are taught in person, not read.
Sources
Each step in this guide is drawn from facts stated by several of these pages independently. Sources that did not corroborate anything used here are not listed.
- STOPPER KNOTS - Kirkpatrick's Climbing Notes andykirkpatrick.substack.com
- How to Tie a Stopper Knot (Ashley Stopper)? Tips, Uses & Video - 101Knots 101knots.com
- Ashley Stopper Knot | How to tie a Ashley Stopper Knot using Step-by ... animatedknots.com
- How to Tie an Ashley Stopper Knot - knotspedia.com knotspedia.com
- Stopper Knot - How to tie a Stopper Knot - NetKnots netknots.com
- How to tie stopper knots knots3d.com
Leave a comment
Comments are reviewed before appearing. See our Privacy Policy for how your name and message are handled.
Comments
No comments yet.