How to Tie a Double Overhand Stopper Knot
The Double Overhand is a stopper knot tied in the end of a rope. It is a plain overhand knot with one extra turn, and that extra turn is what gives it its bulk.
Steps

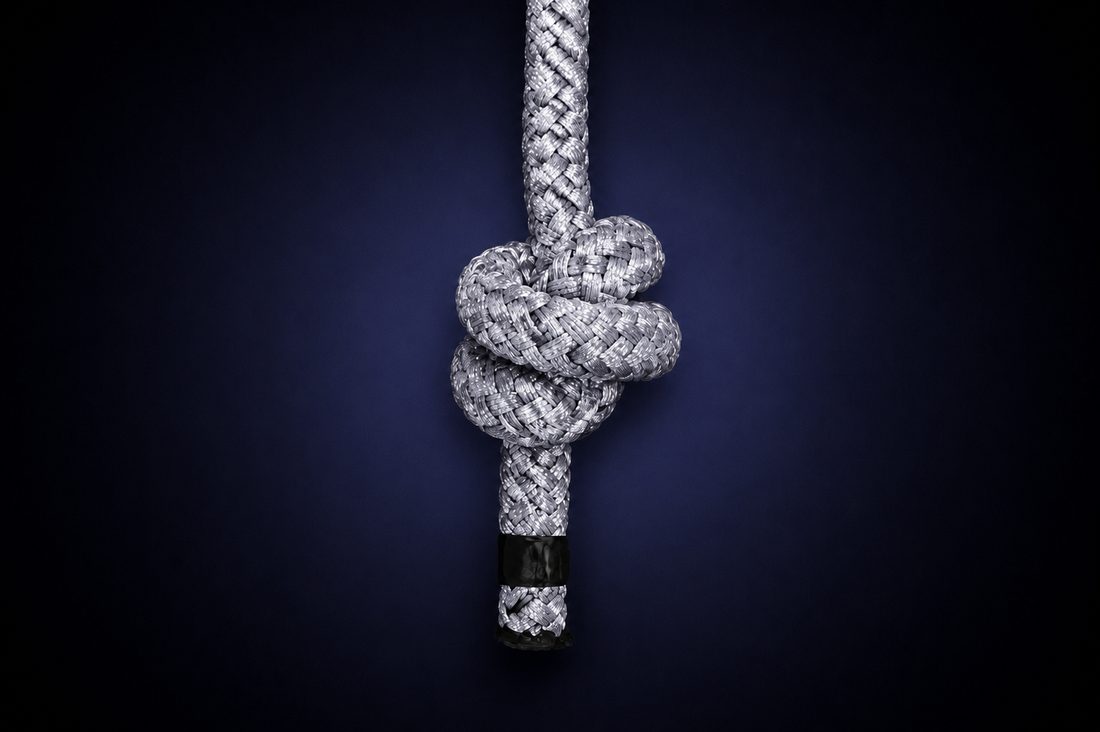
The whole knot, once through. The second pass through the loop is what makes it a double overhand rather than a plain overhand. Choose it as a bulky stopper
The Double Overhand makes a reliable stopper knot at the end of a rope. It is moderately large and fairly bulky, which is exactly what a stopper needs to be.
Look it up as ABOK #516
If you want the reference, this knot is catalogued in The Ashley Book of Knots. It is number 516 there, on page 84.

Leave a long enough tail
Before you tie anything, leave a tail sticking out past where the knot will sit. Two to three inches is the minimum, because the knot tightens under load and eats into that tail.
Tie it with one extra turn
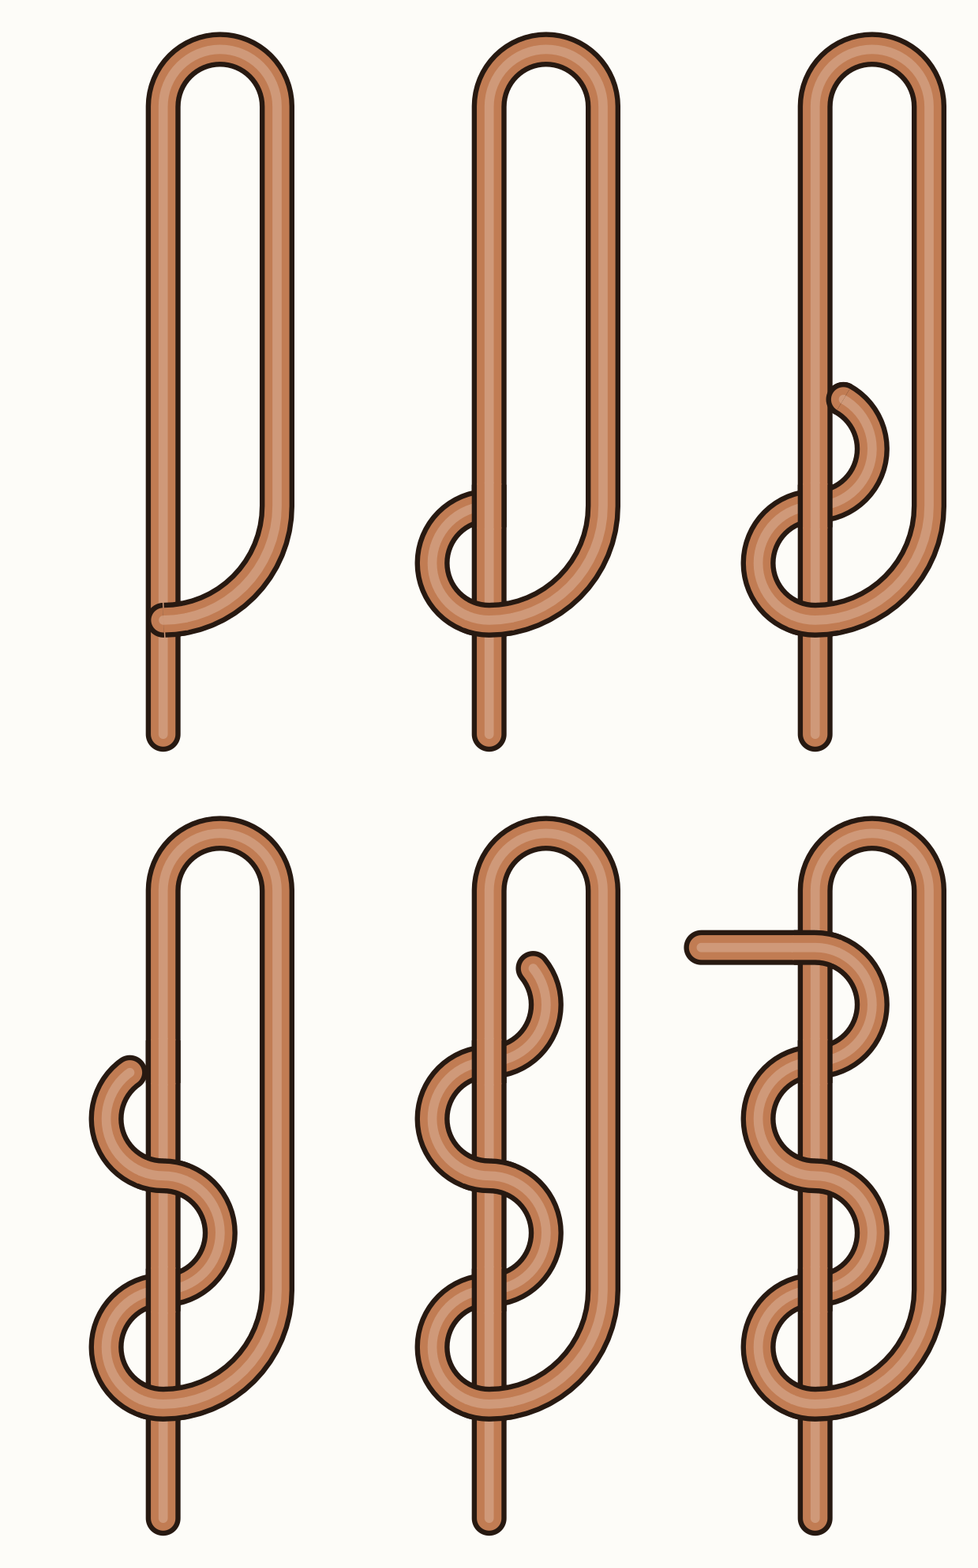
With the tail allowed for, tie the knot like a basic overhand knot but with one more turn. Form a loop in the rope. Pass the working end through the loop, which is the short end you are tying with. Then pass it through the loop a second time and pull both ends to tighten.
Start it around your thumb instead
The same knot can be started a second way, and many people find it quicker. Lay the rope over your thumb. Wrap the working end around the thumb twice, so the second wrap forms an X on top of the thumb. Withdraw your thumb, pass the end through both loops, and dress it, which means tidying the turns so they lie neatly. The loop start suits general rope work. The thumb start suits tying the knot at a set distance from the rope end.
Thread it around a pole or rope
There is a third way in as well. Instead of forming a loop and tucking the end through it, thread the end of the rope through the coil, around a pole or around another rope. Use this method when the knot has to be formed around an object rather than in free rope.
Check for the X and parallel lines
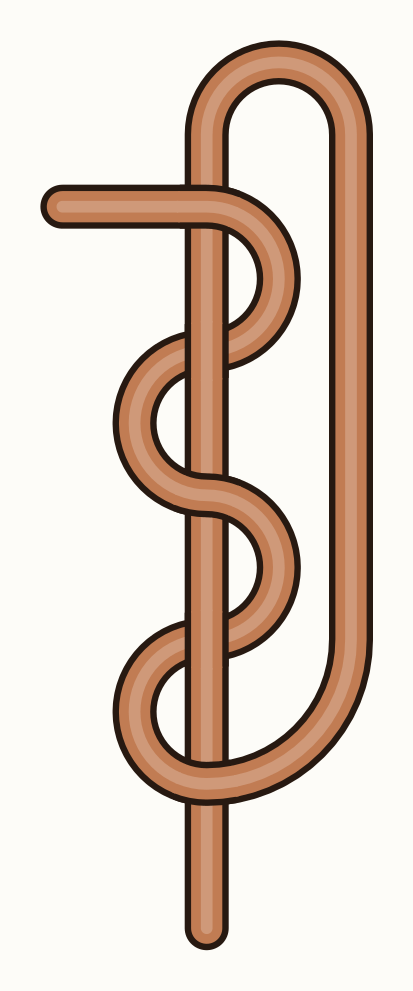
However you started it, look the finished knot over. You have tied it correctly when it shows an X on one side and parallel lines on the other.
- Every start should finish the same: the X on one side and the parallel lines on the other are the check for all three ways of tying this knot. It does not matter whether you began with a loop in free rope, around your thumb, or by threading the end through the coil. The finished knot should look identical in all three cases. If it does not, you have a different knot in your hands.
Twist it into a figure 8 before laying it on
Laid down around an object, this knot becomes a Strangle Knot, and there is a real risk of laying it on the wrong way. Done wrongly, it forms only a half knot beside two turns, which is far less secure. Twist the knot so it looks like a figure 8 before you slide it on and pull it tight.
Expect it to jam under heavy load
This knot has one main drawback, and it is worth knowing before you rely on it. A heavy load can jam it badly. After that it is very difficult to untie, and sometimes impossible.
- The one thing it will not forgive: a hard enough load sets this knot permanently, and no amount of picking will get it back. That is fine where the stopper is meant to stay put for good. It matters a great deal where you expect to untie the rope afterwards and use it again.
Pick another knot for slippery cord
Rope material changes the answer too. On slick, hard-finished cord the turns can creep rather than bite. Add a third turn for more grip, or choose a bulkier stopper.
Put it to work across jobs
On ordinary rope it turns up almost everywhere. It stops a cord pulling back through a hole in a bag, a blind pull, a drawstring or an eyelet. It also does decorative work such as bracelets and beading.
Rely on it in awkward conditions
Part of the reason it travels so well is that it asks so little of you. It is simple enough to tie in poor light, one handed, or with cold hands, and it holds whether the rope is wet or dry.
Build other knots from it
Learning this one opens up several more. The Double Overhand is the basis of the Double Fisherman's Bend, also called the Grapevine, and of the Surgeon's Knot.
Tips
- Think about whether you want the knot back. A heavy load can set this one so hard that it never unties. Keep it for places where a permanent stopper is no trouble, and choose something else where you will need the rope free again.
- Match the knot to the rope. Slippery rope such as Dyneema is the case for the EStar Stopper rather than the Double Overhand.
- Know what it leads to. Once this knot is comfortable, the Double Fisherman's Bend and the Surgeon's Knot are both built on it, so the next few knots come much faster.
Sources
Each step in this guide is drawn from facts stated by several of these pages independently. Sources that did not corroborate anything used here are not listed.
- Guide: How to Tie a Double Overhand Stopper Knot theknotsmanual.com
- Double Overhand Stopper animatedknots.com
- 2 BEST Ways to Tie Double Overhand Knot (Double Thumb Knot) knotspedia.com
- How to Tie a Double Overhand Knot? Variations, Tips, Video & Uses 101knots.com
- Double Overhand Stopper Knot - howtoknots.com howtoknots.com
- Overhand Knot: Tie the Simple Stopper (+ Loop & Double) & Avoid Mistakes castandspear.com
Leave a comment
Comments are reviewed before appearing. See our Privacy Policy for how your name and message are handled.
Comments
No comments yet.